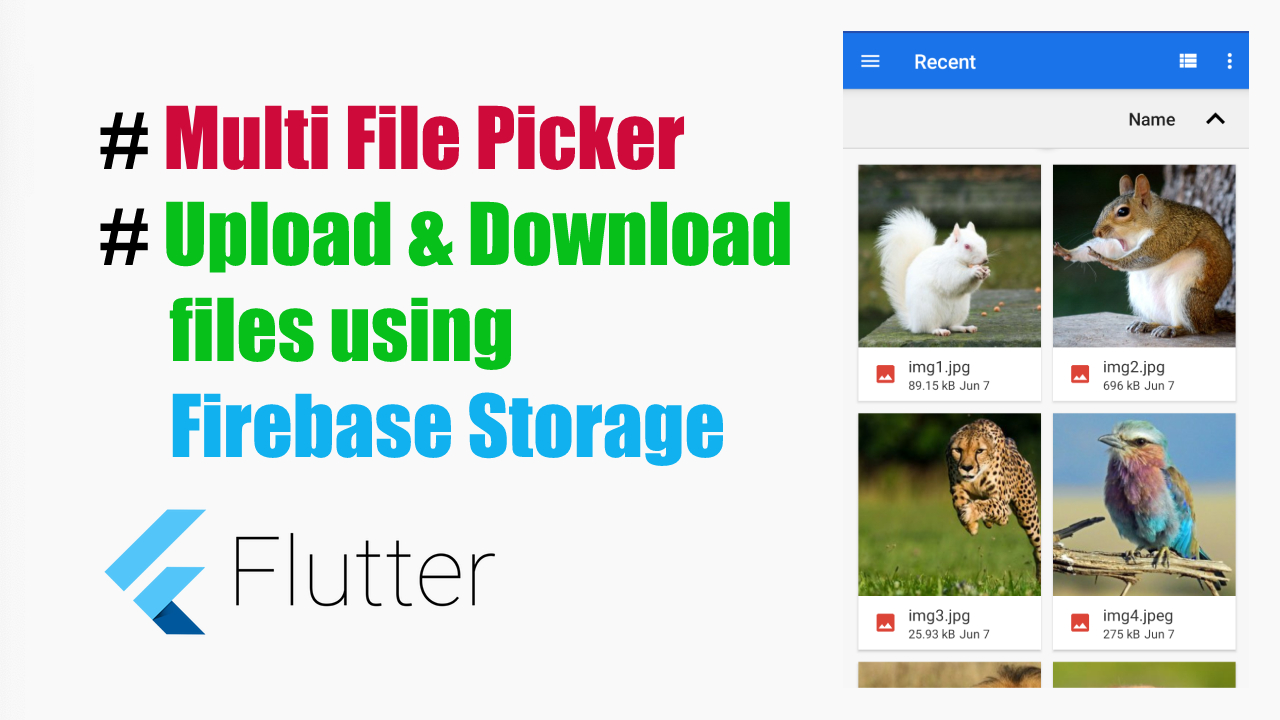
Quantcast
Channel: CoderzHeaven
Viewing all 528 articles
Browse latest View live

Firebase Storage – Uploading and Downloading files & Multi File Picker in Flutter

$
0
0

Firebase Storage


Watch Video Tutorial


This demo shows how to upload files to firebase Storage.
For this demo we will upload only images to firebase Storage.
Also I am doing any sign in to Google, this is completely anonymous.


Let’s start…


Firebase Storage - Upload and Download Files

Firebase Storage – Upload and Download Files


Add Dependencies

we need three plugins for this example

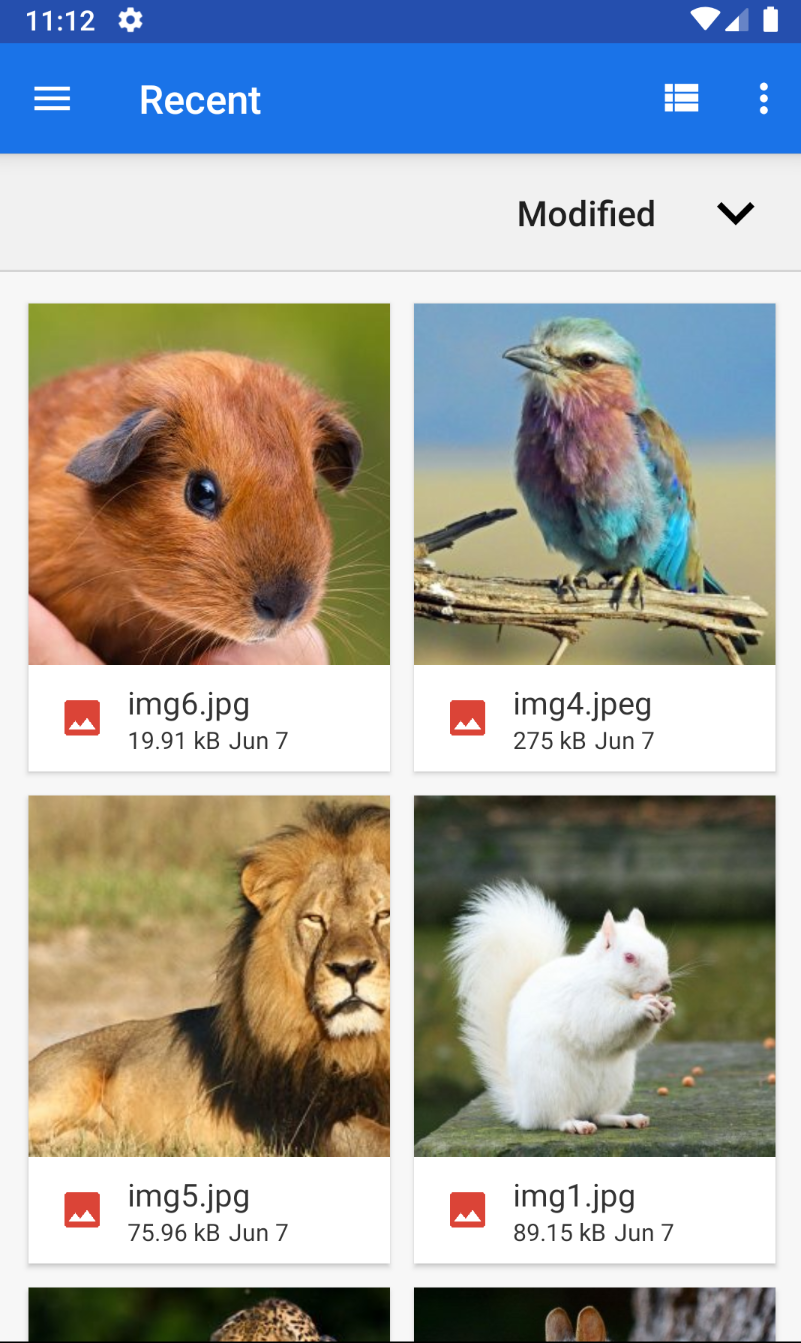
#1 Multiple File Picker

This plugins helps us to select multiple images from the file explorer or gallery.

       file_picker: ^1.1.1
   

#2 Http Package

        http: "0.11.3+17"
    

#3 Firebase Storage

        firebase_storage: ^2.0.0
    

Add DropDown

Lets add a DropDown in the UI to select multiple fiel types.


 dropDown() {
    return DropdownButton(
      hint: new Text('Select'),
      value: _pickType,
      items: <DropdownMenuItem>[
        new DropdownMenuItem(
          child: new Text('Audio'),
          value: FileType.AUDIO,
        ),
        new DropdownMenuItem(
          child: new Text('Image'),
          value: FileType.IMAGE,
        ),
        new DropdownMenuItem(
          child: new Text('Video'),
          value: FileType.VIDEO,
        ),
        new DropdownMenuItem(
          child: new Text('Any'),
          value: FileType.ANY,
        ),
      ],
      onChanged: (value) => setState(() {
            _pickType = value;
          }),
    );
}


Open the File explorer

Lets open the Device’s File explorer and get the Files.
We will also check if the disk is mounted.


// Necessary variables 

String _path;
Map<String, String> _paths;
String _extension;
FileType _pickType;
bool _multiPick = false;
GlobalKey<ScaffoldState> _scaffoldKey = GlobalKey();
List<StorageUploadTask> _tasks = <StorageUploadTask>[];

void openFileExplorer() async {
    try {
      _path = null;
      if (_multiPick) {
        _paths = await FilePicker.getMultiFilePath(
            type: _pickType, fileExtension: _extension);
      } else {
        _path = await FilePicker.getFilePath(
            type: _pickType, fileExtension: _extension);
      }
    } on PlatformException catch (e) {
      print("Unsupported operation" + e.toString());
    }
    if (!mounted) return;
}

Upload files to Firebase

Here we have uploadToFirebase method that loops through the files array and upload each to the Firebase Console.

uploadToFirebase() {
    if (_multiPick) {
        _paths.forEach((fileName, filePath) => {upload(fileName, filePath)});
    } else {
        String fileName = _path.split('/').last;
        String filePath = _path;
        upload(fileName, filePath);
    }
}

upload(fileName, filePath) {
    _extension = fileName.toString().split('.').last;
    StorageReference storageRef =
        FirebaseStorage.instance.ref().child(fileName);
    final StorageUploadTask uploadTask = storageRef.putFile(
        File(filePath),
        StorageMetadata(
        contentType: '$_pickType/$_extension',
        ),
    );
    setState(() {
        _tasks.add(uploadTask);
    });
}

Download Files from Firebase

Below code will to download the file from the firebase Storage with the help of ‘StorageReference’. We are creating a temporary file and writing the downloaded bytes to that file. Then we will show the image in a SnackBar.

Future<void> downloadFile(StorageReference ref) async {
    final String url = await ref.getDownloadURL();
    final http.Response downloadData = await http.get(url);
    final Directory systemTempDir = Directory.systemTemp;
    final File tempFile = File('${systemTempDir.path}/tmp.jpg');
    if (tempFile.existsSync()) {
      await tempFile.delete();
    }
    await tempFile.create();
    final StorageFileDownloadTask task = ref.writeToFile(tempFile);
    final int byteCount = (await task.future).totalByteCount;
    var bodyBytes = downloadData.bodyBytes;
    final String name = await ref.getName();
    final String path = await ref.getPath();
    print(
      'Success!\nDownloaded $name \nUrl: $url'
      '\npath: $path \nBytes Count :: $byteCount',
    );
    _scaffoldKey.currentState.showSnackBar(
      SnackBar(
        backgroundColor: Colors.white,
        content: Image.memory(
          bodyBytes,
          fit: BoxFit.fill,
        ),
      ),
    );
}

Complete Code

import 'package:flutter/material.dart';
import 'dart:io';
import 'package:firebase_storage/firebase_storage.dart';
import 'package:file_picker/file_picker.dart';

import 'package:flutter/services.dart';
import 'package:http/http.dart' as http;

class UploadMultipleImageDemo extends StatefulWidget {
  UploadMultipleImageDemo() : super();

  final String title = 'Firebase Storage';

  @override
  UploadMultipleImageDemoState createState() => UploadMultipleImageDemoState();
}

class UploadMultipleImageDemoState extends State<UploadMultipleImageDemo> {
  //
  String _path;
  Map<String, String> _paths;
  String _extension;
  FileType _pickType;
  bool _multiPick = false;
  GlobalKey<ScaffoldState> _scaffoldKey = GlobalKey();
  List<StorageUploadTask> _tasks = <StorageUploadTask>[];

  void openFileExplorer() async {
    try {
      _path = null;
      if (_multiPick) {
        _paths = await FilePicker.getMultiFilePath(
            type: _pickType, fileExtension: _extension);
      } else {
        _path = await FilePicker.getFilePath(
            type: _pickType, fileExtension: _extension);
      }
      uploadToFirebase();
    } on PlatformException catch (e) {
      print("Unsupported operation" + e.toString());
    }
    if (!mounted) return;
  }

  uploadToFirebase() {
    if (_multiPick) {
      _paths.forEach((fileName, filePath) => {upload(fileName, filePath)});
    } else {
      String fileName = _path.split('/').last;
      String filePath = _path;
      upload(fileName, filePath);
    }
  }

  upload(fileName, filePath) {
    _extension = fileName.toString().split('.').last;
    StorageReference storageRef =
        FirebaseStorage.instance.ref().child(fileName);
    final StorageUploadTask uploadTask = storageRef.putFile(
      File(filePath),
      StorageMetadata(
        contentType: '$_pickType/$_extension',
      ),
    );
    setState(() {
      _tasks.add(uploadTask);
    });
  }

  dropDown() {
    return DropdownButton(
      hint: new Text('Select'),
      value: _pickType,
      items: <DropdownMenuItem>[
        new DropdownMenuItem(
          child: new Text('Audio'),
          value: FileType.AUDIO,
        ),
        new DropdownMenuItem(
          child: new Text('Image'),
          value: FileType.IMAGE,
        ),
        new DropdownMenuItem(
          child: new Text('Video'),
          value: FileType.VIDEO,
        ),
        new DropdownMenuItem(
          child: new Text('Any'),
          value: FileType.ANY,
        ),
      ],
      onChanged: (value) => setState(() {
            _pickType = value;
          }),
    );
  }

  String _bytesTransferred(StorageTaskSnapshot snapshot) {
    return '${snapshot.bytesTransferred}/${snapshot.totalByteCount}';
  }

  @override
  Widget build(BuildContext context) {
    final List<Widget> children = <Widget>[];
    _tasks.forEach((StorageUploadTask task) {
      final Widget tile = UploadTaskListTile(
        task: task,
        onDismissed: () => setState(() => _tasks.remove(task)),
        onDownload: () => downloadFile(task.lastSnapshot.ref),
      );
      children.add(tile);
    });

    return new MaterialApp(
      home: new Scaffold(
        key: _scaffoldKey,
        appBar: new AppBar(
          title: Text(widget.title),
        ),
        body: new Container(
          padding: EdgeInsets.all(20.0),
          child: Column(
            crossAxisAlignment: CrossAxisAlignment.start,
            mainAxisAlignment: MainAxisAlignment.start,
            children: <Widget>[
              dropDown(),
              SwitchListTile.adaptive(
                title: Text('Pick multiple files', textAlign: TextAlign.left),
                onChanged: (bool value) => setState(() => _multiPick = value),
                value: _multiPick,
              ),
              OutlineButton(
                onPressed: () => openFileExplorer(),
                child: new Text("Open file picker"),
              ),
              SizedBox(
                height: 20.0,
              ),
              Flexible(
                child: ListView(
                  children: children,
                ),
              ),
            ],
          ),
        ),
      ),
    );
  }

  Future<void> downloadFile(StorageReference ref) async {
    final String url = await ref.getDownloadURL();
    final http.Response downloadData = await http.get(url);
    final Directory systemTempDir = Directory.systemTemp;
    final File tempFile = File('${systemTempDir.path}/tmp.jpg');
    if (tempFile.existsSync()) {
      await tempFile.delete();
    }
    await tempFile.create();
    final StorageFileDownloadTask task = ref.writeToFile(tempFile);
    final int byteCount = (await task.future).totalByteCount;
    var bodyBytes = downloadData.bodyBytes;
    final String name = await ref.getName();
    final String path = await ref.getPath();
    print(
      'Success!\nDownloaded $name \nUrl: $url'
      '\npath: $path \nBytes Count :: $byteCount',
    );
    _scaffoldKey.currentState.showSnackBar(
      SnackBar(
        backgroundColor: Colors.white,
        content: Image.memory(
          bodyBytes,
          fit: BoxFit.fill,
        ),
      ),
    );
  }
}

class UploadTaskListTile extends StatelessWidget {
  const UploadTaskListTile(
      {Key key, this.task, this.onDismissed, this.onDownload})
      : super(key: key);

  final StorageUploadTask task;
  final VoidCallback onDismissed;
  final VoidCallback onDownload;

  String get status {
    String result;
    if (task.isComplete) {
      if (task.isSuccessful) {
        result = 'Complete';
      } else if (task.isCanceled) {
        result = 'Canceled';
      } else {
        result = 'Failed ERROR: ${task.lastSnapshot.error}';
      }
    } else if (task.isInProgress) {
      result = 'Uploading';
    } else if (task.isPaused) {
      result = 'Paused';
    }
    return result;
  }

  String _bytesTransferred(StorageTaskSnapshot snapshot) {
    return '${snapshot.bytesTransferred}/${snapshot.totalByteCount}';
  }

  @override
  Widget build(BuildContext context) {
    return StreamBuilder<StorageTaskEvent>(
      stream: task.events,
      builder: (BuildContext context,
          AsyncSnapshot<StorageTaskEvent> asyncSnapshot) {
        Widget subtitle;
        if (asyncSnapshot.hasData) {
          final StorageTaskEvent event = asyncSnapshot.data;
          final StorageTaskSnapshot snapshot = event.snapshot;
          subtitle = Text('$status: ${_bytesTransferred(snapshot)} bytes sent');
        } else {
          subtitle = const Text('Starting...');
        }
        return Dismissible(
          key: Key(task.hashCode.toString()),
          onDismissed: (_) => onDismissed(),
          child: ListTile(
            title: Text('Upload Task #${task.hashCode}'),
            subtitle: subtitle,
            trailing: Row(
              mainAxisSize: MainAxisSize.min,
              children: <Widget>[
                Offstage(
                  offstage: !task.isInProgress,
                  child: IconButton(
                    icon: const Icon(Icons.pause),
                    onPressed: () => task.pause(),
                  ),
                ),
                Offstage(
                  offstage: !task.isPaused,
                  child: IconButton(
                    icon: const Icon(Icons.file_upload),
                    onPressed: () => task.resume(),
                  ),
                ),
                Offstage(
                  offstage: task.isComplete,
                  child: IconButton(
                    icon: const Icon(Icons.cancel),
                    onPressed: () => task.cancel(),
                  ),
                ),
                Offstage(
                  offstage: !(task.isComplete && task.isSuccessful),
                  child: IconButton(
                    icon: const Icon(Icons.file_download),
                    onPressed: onDownload,
                  ),
                ),
              ],
            ),
          ),
        );
      },
    );
  }
}


Flutter Tutorial – List Pull to Refresh and Swipe to Delete in Flutter

$
0
0

Let’s start with Swipe to Delete.

To Swipe and delete a row, each row in the list should be made up of Dismissible Widget. The Dismissible widget has inbuilt listeners for Swipe Gestures.


Swipe to delete & Pull to Refresh

Swipe to delete & Pull to Refresh


Watch Video Tutorial


Swipe to Delete

Here we will have a list of Strings which are a list of companies.
Each row in the List is a Dismissible widget. The onDismissed will be triggered
when the user swipes. We need to remove the corresponding row from the list data-source accordingly, otherwise it will result in the error being the Dismissible widget not removed from the tree when you manipulate the datasource again. So this is a very important step.

  List<String> companies;

  @override
  void initState() {
    super.initState();
    companies = List();
    addCompanies();
  }

  /* Initialize the list with Some company names */
  addCompanies() {
    companies.add("Google");
    companies.add("Apple");
    companies.add("Samsung");
    companies.add("Sony");
    companies.add("LG");
  }

  /* Remove the data from the List DataSource */
  removeCompany(index) {
    setState(() {
      companies.removeAt(index);
    });
  }

  /* Undo the Deleted row when user clicks on UNDO in the SnackBar message */
  undoDelete(index, company) {
    setState(() {
      companies.insert(index, company);
    });
  }

  /* Show Snackbar when Deleted with an action to Undo the delete */
  showSnackBar(context, company, index) {
    Scaffold.of(context).showSnackBar(SnackBar(
      content: Text('$company deleted'),
      action: SnackBarAction(
        label: "UNDO",
        onPressed: () {
          undoDelete(index, company);
        },
      ),
    ));
  }

  /* Give a background to the Swipe Delete as a indicator to Delete */
  Widget refreshBg() {
    return Container(
      alignment: Alignment.centerRight,
      padding: EdgeInsets.only(right: 20.0),
      color: Colors.red,
      child: const Icon(
        Icons.delete,
        color: Colors.white,
      ),
    );
  }

  Widget list() {
    return ListView.builder(
      padding: EdgeInsets.all(20.0),
      itemCount: companies.length,
      itemBuilder: (BuildContext context, int index) {
        return row(context, index);
      },
    );
  }

  Widget row(context, index) {
    return Dismissible(
      key: Key(companies[index]), // UniqueKey().toString()
      onDismissed: (direction) {
        var company = companies[index];
        showSnackBar(context, company, index);
        removeCompany(index);
      },
      background: refreshBg(),
      child: Card(
        child: ListTile(
          title: Text(companies[index]),
        ),
      ),
    );
  }

  @override
  Widget build(BuildContext context) {
    return Scaffold(
      appBar: AppBar(
        title: Text(widget.title),
      ),
      body: Container(
        child: list(),
      ),
    );
  }


Pull to Refresh

To add Pull to Refresh, Wrap the List with the RefreshIndicator Widget and implement the onRefresh callback.The code will change like this.

 
 /* Mimic a delay and add a random value to the list */
 Future<Null> refreshList() async {
    await Future.delayed(Duration(seconds: 10));
    addRandomCompany();
    return null;
  }

  ...
  RefreshIndicator(
    key: refreshKey,
    onRefresh: () async {
      await refreshList();
    },
    child: list(),
  )

Complete Code

The Complete source code will look like this.

import 'package:flutter/material.dart';
import 'dart:math';

class SwipeDeleteDemo extends StatefulWidget {
  SwipeDeleteDemo() : super();

  final String title = "Refresh/Swipe Delete Demo";

  @override
  SwipeDeleteDemoState createState() => SwipeDeleteDemoState();
}

class SwipeDeleteDemoState extends State<SwipeDeleteDemo> {
  //
  List<String> companies;
  GlobalKey<RefreshIndicatorState> refreshKey;
  Random r;

  @override
  void initState() {
    super.initState();
    refreshKey = GlobalKey<RefreshIndicatorState>();
    r = Random();
    companies = List();
    addCompanies();
  }

  addCompanies() {
    companies.add("Google");
    companies.add("Apple");
    companies.add("Samsung");
    companies.add("Sony");
    companies.add("LG");
  }

  addRandomCompany() {
    int nextCount = r.nextInt(100);
    setState(() {
      companies.add("Company $nextCount");
    });
  }

  removeCompany(index) {
    setState(() {
      companies.removeAt(index);
    });
  }

  undoDelete(index, company) {
    setState(() {
      companies.insert(index, company);
    });
  }

  Future<Null> refreshList() async {
    await Future.delayed(Duration(seconds: 10));
    addRandomCompany();
    return null;
  }

  showSnackBar(context, company, index) {
    Scaffold.of(context).showSnackBar(SnackBar(
      content: Text('$company deleted'),
      action: SnackBarAction(
        label: "UNDO",
        onPressed: () {
          undoDelete(index, company);
        },
      ),
    ));
  }

  Widget refreshBg() {
    return Container(
      alignment: Alignment.centerRight,
      padding: EdgeInsets.only(right: 20.0),
      color: Colors.red,
      child: const Icon(
        Icons.delete,
        color: Colors.white,
      ),
    );
  }

  Widget list() {
    return ListView.builder(
      padding: EdgeInsets.all(20.0),
      itemCount: companies.length,
      itemBuilder: (BuildContext context, int index) {
        return row(context, index);
      },
    );
  }

  Widget row(context, index) {
    return Dismissible(
      key: Key(companies[index]), // UniqueKey().toString()
      onDismissed: (direction) {
        var company = companies[index];
        showSnackBar(context, company, index);
        removeCompany(index);
      },
      background: refreshBg(),
      child: Card(
        child: ListTile(
          title: Text(companies[index]),
        ),
      ),
    );
  }

  @override
  Widget build(BuildContext context) {
    return Scaffold(
      appBar: AppBar(
        title: Text(widget.title),
      ),
      body: RefreshIndicator(
        key: refreshKey,
        onRefresh: () async {
          await refreshList();
        },
        child: list(),
      ),
    );
  }
}

Thanks for reading.

Please leave your valuable comments below the post.

Watch the Youtube tutorial to see everything in action and Subscribe for more videos.

Animations made simple in Flutter using Animator Plugin

$
0
0

This is a simple demo showing how you can animate views in flutter using very little code.


Watch Video Tutorial


Here is the simple code in which I am showing all basic functions in different different functions. You can call these methods in the build method and execute all.

import 'package:flutter/material.dart';
import 'package:animator/animator.dart';
import 'dart:math';

class AnimationDemo extends StatefulWidget {
  AnimationDemo() : super();

  final String title = "Flutter Animation";

  @override
  AnimationDemoState createState() => AnimationDemoState();
}

class AnimationDemoState extends State<AnimationDemo> {
  //
  final logo = FlutterLogo(
    size: 100,
  );

  // Animate Opacity
  Widget animateOpacity() {
    return Animator(
      // repeats: 5,
      cycles: 2 * 5, // forward and backward 5 times
      builder: (anim) => Opacity(
            opacity: anim.value,
            child: logo,
          ),
    );
  }

  // Animate FadeTransition
  Widget animateFadeIn() {
    return Animator(
      duration: Duration(seconds: 1),
      curve: Curves.elasticOut,
      // repeats: 5,
      cycles: 0, // infinite
      builder: (anim) => FadeTransition(
            opacity: anim,
            child: logo,
          ),
    );
  }

  // Transform Scale
  Widget transformScale() {
    return Animator(
      duration: Duration(seconds: 3),
      cycles: 0,
      builder: (anim) => Transform.scale(
            scale: anim.value,
            alignment: Alignment.bottomRight,
            child: logo,
          ),
    );
  }

  // Transform Scale
  Widget transformScale2() {
    return Animator(
      tween: Tween<double>(begin: 0.5, end: 1.5),
      duration: Duration(seconds: 2),
      curve: Curves.elasticOut,
      cycles: 0,
      builder: (anim) => Transform.scale(
            scale: anim.value,
            alignment: Alignment.bottomRight,
            child: logo,
          ),
    );
  }

  // Size Transition
  Widget sizeTransition1() {
    return Animator(
      duration: Duration(seconds: 3),
      cycles: 0,
      builder: (anim) => SizeTransition(
            sizeFactor: anim,
            child: logo,
          ),
    );
  }

  // Size Transition
  Widget sizeTransition2() {
    return Animator(
      duration: Duration(seconds: 3),
      cycles: 0,
      builder: (anim) => SizeTransition(
            axis: Axis.horizontal,
            sizeFactor: anim,
            child: logo,
          ),
    );
  }

  // Size Transition
  Widget sizeTransition3() {
    return Animator(
      duration: Duration(seconds: 3),
      cycles: 0,
      builder: (anim) => SizeTransition(
            axis: Axis.horizontal,
            axisAlignment: -1,
            sizeFactor: anim,
            child: logo,
          ),
    );
  }

  // Size Transition
  Widget sizeTransition4() {
    return Animator(
      tween: Tween<double>(begin: 0.5, end: 1.5),
      duration: Duration(seconds: 3),
      cycles: 0,
      builder: (anim) => SizeTransition(
            axis: Axis.horizontal,
            axisAlignment: 1,
            sizeFactor: anim,
            child: logo,
          ),
    );
  }

  // Rotate Animation
  Widget rotate() {
    return Animator(
      tween: Tween<double>(begin: 0, end: 2 * pi),
      duration: Duration(seconds: 3),
      cycles: 0,
      builder: (anim) => Transform.rotate(
            angle: anim.value,
            child: logo,
          ),
    );
  }

  // Rotate Animation
  Widget rotate2() {
    return Animator(
      tween: Tween<double>(begin: 0, end: 2 * pi),
      duration: Duration(seconds: 2),
      cycles: 0,
      curve: Curves.elasticOut,
      builder: (anim) => Transform(
            transform: Matrix4.rotationZ(anim.value),
            alignment: Alignment.center,
            child: logo,
          ),
    );
  }

  // Rotate Animation
  Widget rotate3() {
    return Animator(
      tween: Tween<double>(begin: 0, end: 3),
      duration: Duration(seconds: 2),
      repeats: 0,
      builder: (anim) => Transform(
            transform: Matrix4.rotationZ(anim.value),
            alignment: Alignment.center,
            child: logo,
          ),
    );
  }

  // Rotate Animation
  Widget rotate4() {
    return Animator(
      tween: Tween<double>(begin: 0, end: 3),
      duration: Duration(seconds: 2),
      repeats: 0,
      builder: (anim) => RotationTransition(
            turns: anim,
            alignment: Alignment.center,
            child: logo,
          ),
    );
  }

  // Skew Animation
  Widget skew1() {
    return Animator(
      tween: Tween<double>(begin: 0, end: 3),
      duration: Duration(seconds: 2),
      repeats: 0,
      builder: (anim) => Transform(
            transform: Matrix4.skewX(anim.value),
            child: Container(
              decoration: BoxDecoration(
                border: Border.all(
                  color: Colors.blue,
                ),
              ),
              child: logo,
            ),
          ),
    );
  }

  // Skew Animation
  Widget skew2() {
    return Animator(
      tween: Tween<double>(begin: -0.5, end: 0.5),
      duration: Duration(seconds: 2),
      cycles: 0,
      builder: (anim) => Transform(
            transform: Matrix4.skew(anim.value, anim.value),
            child: Container(
              decoration: BoxDecoration(
                border: Border.all(
                  color: Colors.blue,
                ),
              ),
              child: logo,
            ),
          ),
    );
  }

  // Skew Animation
  Widget skew3() {
    return Animator(
      tween: Tween<Offset>(begin: Offset(-1, 0), end: Offset(1, 0)),
      duration: Duration(seconds: 2),
      cycles: 0,
      builder: (anim) => FractionalTranslation(
            translation: anim.value,
            child: logo,
          ),
    );
  }

  // Scale From Center
  Widget scaleFromCenter() {
    return Animator(
      duration: Duration(seconds: 2),
      cycles: 0,
      builder: (anim) => SizedBox(
            width: anim.value * 50,
            height: anim.value * 50,
            child: logo,
          ),
    );
  }

  // Translate Animations
  Widget translate1() {
    return Animator(
      tween: Tween<Offset>(
        begin: Offset(-50, 0),
        end: Offset(50, 0),
      ),
      duration: Duration(seconds: 2),
      cycles: 0,
      builder: (anim) => Transform.translate(
            offset: anim.value,
            child: logo,
          ),
    );
  }

  // Translate Animations
  Widget translate2() {
    return Animator(
      tween: Tween<Offset>(
        begin: Offset(-1, 0),
        end: Offset(1, 0),
      ),
      duration: Duration(seconds: 2),
      cycles: 0,
      builder: (anim) => SlideTransition(
            position: anim,
            child: logo,
          ),
    );
  }

  // Transform Animations
  Widget transform1() {
    return Animator(
      tween: Tween<Offset>(
        begin: Offset(-50, 0),
        end: Offset(50, 0),
      ),
      duration: Duration(seconds: 2),
      cycles: 0,
      builder: (anim) => Transform(
            transform: Matrix4.translationValues(anim.value.dx, 0, 0),
            child: logo,
          ),
    );
  }

  // Transform Animations
  Widget transform2() {
    return Animator(
      duration: Duration(seconds: 2),
      curve: Curves.bounceInOut,
      cycles: 0,
      builder: (anim) => Transform(
            transform: Matrix4.translationValues(anim.value * 100, 0, 0)
              ..rotateZ(anim.value * 4 * pi),
            child: logo,
          ),
    );
  }

  // Transform Animations
  Widget transform3() {
    return Animator(
      duration: Duration(seconds: 2),
      cycles: 0,
      builder: (anim) => Transform(
            transform: Matrix4.translationValues(anim.value * 100, 0, 0)
              ..rotateZ(anim.value * 4 * pi),
            child: logo,
          ),
    );
  }

  // Transform Animations
  Widget transform4() {
    return Animator(
      duration: Duration(seconds: 2),
      cycles: 0,
      builder: (anim) => Transform(
            transform: Matrix4.translationValues(anim.value * 100, 0, 0)
              ..rotateZ(anim.value * 4 * pi)
              ..scale(anim.value),
            child: logo,
          ),
    );
  }

  Widget opacityWithTranslationRotation() {
    return Animator(
      tweenMap: {
        'opacity': Tween<double>(begin: 0, end: 1),
        'translation': Tween<Offset>(begin: Offset.zero, end: Offset(1, 0)),
        'rotation': Tween<double>(begin: 0, end: 4 * pi),
      },
      duration: Duration(seconds: 2),
      cycles: 0,
      builderMap: (Map<String, Animation> anim) => FadeTransition(
            opacity: anim['opacity'],
            child: FractionalTranslation(
              translation: anim['translation'].value,
              child: Transform.rotate(
                angle: anim['rotation'].value,
                child: logo,
              ),
            ),
          ),
    );
  }

  Widget opacityWithTranslationRotationColor() {
    return Animator(
      tweenMap: {
        'opacity': Tween<double>(begin: 0, end: 1),
        'translation': Tween<Offset>(begin: Offset.zero, end: Offset(1, 0)),
        'rotation': Tween<double>(begin: 0, end: 4 * pi),
        'color': ColorTween(begin: Colors.blueAccent, end: Colors.redAccent),
      },
      duration: Duration(seconds: 2),
      cycles: 0,
      builderMap: (Map<String, Animation> anim) => FadeTransition(
            opacity: anim['opacity'],
            child: FractionalTranslation(
              translation: anim['translation'].value,
              child: Transform.rotate(
                angle: anim['rotation'].value,
                child: Stack(
                  alignment: Alignment.topCenter,
                  children: <Widget>[
                    Container(
                      width: 50,
                      height: 50,
                      decoration: BoxDecoration(
                        color: Colors.white,
                        shape: BoxShape.circle,
                      ),
                    ),
                    Container(
                      width: 50,
                      height: 50,
                      decoration: BoxDecoration(
                        color: anim['color'].value,
                        shape: BoxShape.circle,
                      ),
                    ),
                  ],
                ),
              ),
            ),
          ),
    );
  }

  @override
  Widget build(BuildContext context) {
    return Scaffold(
      appBar: AppBar(
        title: Text(widget.title),
      ),
      body: Container(
        padding: EdgeInsets.all(20.0),
        child: Center(
          child: opacityWithTranslationRotationColor(),
        ),
      ),
    );
  }
}

Custom Splash Screen in Flutter for Android and iOS.

$
0
0

Lets start with iOS

Watch Video Tutorial


iOS

Go to the flutter project folder and open the iOS folder. You will see the runner.xcodeworkspace file. Open the file in Xcode.

Now if you select the root folder and select the target and go the General Tab, Here just towards the bottom
you will see an option to set the Launch Screen, where you can select a Launch screen from the list.

Launch Screen iOS

Launch Screen iOS

By default iOS creates a LaunchScreen called LaunchScreen.storyboard. If you go to the file list on the left and
open it you should see a blank view controller as shown below.

Launch Screen iOS

Launch Screen iOS

Set a Splash Image

Select the ‘Assets.xcassets’ folder and add some images that you want to see in the splash screen.
Add 1x,2x and 3x images to the LaunchImage images.
Now go to the LaunchScreen.storyboard and set the launchImage in the imageview.

Custom Splash Screen iOS

Custom Splash Screen iOS


That’s it.

Android

Open the Android project in Android Studio and go to the ‘res/drawable’ folder. There you can see the launch_background.xml

Add a new Item to it.

<?xml version="1.0" encoding="utf-8"?><!-- Modify this file to customize your launch splash screen -->
<layer-list xmlns:android="http://schemas.android.com/apk/res/android">
    <item android:drawable="@android:color/white" />

    <!-- You can insert your own image assets here -->
    <item android:drawable="@android:color/holo_green_light" />
    <item>
        <bitmap
            android:gravity="center"
            android:src="@mipmap/ic_launcher" />
    </item>


</layer-list>

Run the app and you should see the new splash screen.


Expanded/ Multi-Level List in Flutter for Android and iOS

$
0
0

Here is a simple example for creating expanded list in flutter.

Watch Video Tutorial


We will create a new class named “Entry” which will be the data on each row of the list.

class Entry {
  final String title;
  final List<Entry>
      children; // Since this is an expansion list ...children can be another list of entries
  Entry(this.title, [this.children = const <Entry>[]]);
}

Data Source

Let’s create the array to be shown in the expanded list.

// This is the entire multi-level list displayed by this app
final List<Entry> data = <Entry>[
  Entry(
    'Chapter A',
    <Entry>[
      Entry(
        'Section A0',
        <Entry>[
          Entry('Item A0.1'),
          Entry('Item A0.2'),
          Entry('Item A0.3'),
        ],
      ),
      Entry('Section A1'),
      Entry('Section A2'),
    ],
  ),
  // Second Row
  Entry('Chapter B', <Entry>[
    Entry('Section B0'),
    Entry('Section B1'),
  ]),
  Entry(
    'Chapter C',
    <Entry>[
      Entry('Section C0'),
      Entry('Section C1'),
      Entry(
        'Section C2',
        <Entry>[
          Entry('Item C2.0'),
          Entry('Item C2.1'),
          Entry('Item C2.2'),
          Entry('Item C2.3'),
        ],
      )
    ],
  ),
];

Create Row Widget

// Create the Widget for the row
class EntryItem extends StatelessWidget {
  const EntryItem(this.entry);
  final Entry entry;

  // This function recursively creates the multi-level list rows.
  Widget _buildTiles(Entry root) {
    if (root.children.isEmpty) {
      return ListTile(
        title: Text(root.title),
      );
    }
    return ExpansionTile(
      key: PageStorageKey<Entry>(root),
      title: Text(root.title),
      children: root.children.map<Widget>(_buildTiles).toList(),
    );
  }

  @override
  Widget build(BuildContext context) {
    return _buildTiles(entry);
  }
}

Create the List

ListView.builder(
    itemCount: data.length,
    itemBuilder: (BuildContext context, int index) => EntryItem(
        data[index],
        ),
),

That’s it.


Complete code

import 'package:flutter/material.dart';

class ExpansionTileDemo extends StatelessWidget {
  @override
  Widget build(BuildContext context) {
    return MaterialApp(
      home: Scaffold(
        appBar: AppBar(
          title: const Text('Expansion List'),
        ),
        body: ListView.builder(
          itemCount: data.length,
          itemBuilder: (BuildContext context, int index) => EntryItem(
                data[index],
              ),
        ),
      ),
    );
  }
}

// Welcome to another flutter tutorial
// In this video we will see how to create a multi-level Expansion List
// First Let's create a class for each row in the Expansion List

class Entry {
  final String title;
  final List<Entry>
      children; // Since this is an expansion list ...children can be another list of entries
  Entry(this.title, [this.children = const <Entry>[]]);
}

// This is the entire multi-level list displayed by this app
final List<Entry> data = <Entry>[
  Entry(
    'Chapter A',
    <Entry>[
      Entry(
        'Section A0',
        <Entry>[
          Entry('Item A0.1'),
          Entry('Item A0.2'),
          Entry('Item A0.3'),
        ],
      ),
      Entry('Section A1'),
      Entry('Section A2'),
    ],
  ),
  // Second Row
  Entry('Chapter B', <Entry>[
    Entry('Section B0'),
    Entry('Section B1'),
  ]),
  Entry(
    'Chapter C',
    <Entry>[
      Entry('Section C0'),
      Entry('Section C1'),
      Entry(
        'Section C2',
        <Entry>[
          Entry('Item C2.0'),
          Entry('Item C2.1'),
          Entry('Item C2.2'),
          Entry('Item C2.3'),
        ],
      )
    ],
  ),
];

// Create the Widget for the row
class EntryItem extends StatelessWidget {
  const EntryItem(this.entry);
  final Entry entry;

  // This function recursively creates the multi-level list rows.
  Widget _buildTiles(Entry root) {
    if (root.children.isEmpty) {
      return ListTile(
        title: Text(root.title),
      );
    }
    return ExpansionTile(
      key: PageStorageKey<Entry>(root),
      title: Text(root.title),
      children: root.children.map<Widget>(_buildTiles).toList(),
    );
  }

  @override
  Widget build(BuildContext context) {
    return _buildTiles(entry);
  }
}

Google’s Flutter Quick Tips

$
0
0

Here are few quick tips for flutter developers..


Watch Video Tutorial


1. Timer

void periodic() {
Timer.periodic(
    Duration(seconds: 1),
    (Timer time) {
    print("time: ${time.tick}");
    if (time.tick == 5) {
        time.cancel();
        print('Timer Cancelled');
    }
    },
);

2. Get Device Type

 void getDevice() {
    bool ios = Platform.isAndroid;
    print('iOS1: $ios');
    bool isIOS = Theme.of(context).platform == TargetPlatform.iOS;
    print('iOS2: $isIOS');

    // Do not explicitly initialize variables to null.
    var test; //good
    var test1 = null; // bad
}

3. ToolTips

 void getDevice() {
    bool ios = Platform.isAndroid;
    print('iOS1: $ios');
    bool isIOS = Theme.of(context).platform == TargetPlatform.iOS;
    print('iOS2: $isIOS');

    // Do not explicitly initialize variables to null.
    var test; //good
    var test1 = null; // bad
}

4. Fade Image

Add a ‘loading.gif’ image inside a folder ‘images’ in the root of your project. We will use this image as a placeholder for the downloading image.

Note: Make sure you specify the ‘images’ folder in the ‘assets’ section in the pubspec.yaml file which is present in the root of your project.

 # To add assets to your application, add an assets section, like this:
  assets:
   - images/
   ...
Widget fadeImage() {
    return FadeInImage.assetNetwork(
        placeholder: 'images/loading.gif',
        image: fadeImgUrl,
    );
}

5. Cache Image

Add the image caching plugin in the pubspec.yaml file.

dependencies:
  flutter: 
    sdk: flutter

  ...
  cached_network_image: ^1.0.0 
  ...

6. ListView inside a Column Widget

If you are adding a ListView inside a Column widget, make sure you add it inside a Expanded Widget, otherwise it will result in overflow or error.

Widget list() {
    List<String> companies = [
      'Google',
      'Facebook',
      'Apple',
      'Google',
      'Facebook',
      'Apple',
      'Google',
      'Facebook',
      'Apple',
      'Google',
      'Facebook',
      'Apple',
      'Google',
      'Facebook',
      'Apple',
      'Google',
      'Facebook',
      'Apple',
      'Google',
      'Facebook',
      'Apple',
      'Google',
      'Facebook',
      'Apple',
    ];
    return Expanded(
      child: ListView.builder(
        itemCount: companies.length,
        itemBuilder: (BuildContext context, int index) {
          return Padding(
            padding: EdgeInsets.all(20.0),
            child: Text(
              companies[index],
              style: TextStyle(color: Colors.black),
            ),
          );
        },
      ),
    );
  }

....
// In the build method...

body: Container(
    padding: EdgeInsets.all(20.0),
    child: Column(
        children: <Widget>[
        list(),
        ],
    ),
),

That’s it. Watch the youtube video to see all these in action.
Thanks.

Please leave your valuable feedback below this post.

Auto Generate JSON Models in Flutter, Filtering a List and Delay Searching

$
0
0

Generate JSON Flutter

Generate JSON Flutter


Filter List Flutter

Filter List Flutter


In this article we will see how to automatically generate json models in Flutter.

Add Plugins

For this we need some plugins…

Open the pubspec.yaml file and add these dependencies.

If you want to use json annotation, you can have ‘json_annotation’ plugin as well.

dependencies:
  flutter: 
    sdk: flutter
    ...
    json_annotation:
 
dev_dependencies:
  flutter_test:
    sdk: flutter
  json_model:
  build_runner: ^1.0.0
  json_serializable: ^2.0.0

Below is the url that we are going to parse and create the models for.

https://jsonplaceholder.typicode.com/users

Here you can see 10 User records.

Let’s Start…


The first thing we have to do is to create a folder named ‘jsons‘ in the root of our project. This is the default folder, but you can have your own name. In that case, you need to specify the folder named while running the auto generate commands in the terminal.

Now create a new file named “user.json” in the ‘jsons‘ folder and copy the user record into it.

  {
    "id": 1,
    "name": "Leanne Graham",
    "username": "Bret",
    "email": "Sincere@april.biz",
    "address": {
      "street": "Kulas Light",
      "suite": "Apt. 556",
      "city": "Gwenborough",
      "zipcode": "92998-3874",
      "geo": {
        "lat": "-37.3159",
        "lng": "81.1496"
      }
    },
    "phone": "1-770-736-8031 x56442",
    "website": "hildegard.org",
    "company": {
      "name": "Romaguera-Crona",
      "catchPhrase": "Multi-layered client-server neural-net",
      "bs": "harness real-time e-markets"
    }
  }
  

Then go to terminal and run the following command.

  flutter packages pub run json_model
 

Now you should see a new folder named “models” inside the “lib” folder.

There you can see the autogenerated user model file.

So far so good…but its not over.

We have nested objects inside user object.

The “address” property is the nested object.

Create a new ‘address.json’ file inside ‘jsons’ folder and change the json in the users.json to below.

  {
    "id": 1,
    "name": "Leanne Graham",
    "username": "Bret",
    "email": "Sincere@april.biz",
    "address": "$address", // address is the file name
    "phone": "1-770-736-8031 x56442",
    "website": "hildegard.org",
    "company": {
      "name": "Romaguera-Crona",
      "catchPhrase": "Multi-layered client-server neural-net",
      "bs": "harness real-time e-markets"
    }
  }
  

Run the command again and you should see the new generated files and User model is updated like below. Do the same thing for ‘geo’ and ‘company nested objects.


@JsonSerializable()
class User {
    User();

    num id;
    String name;
    String username;
    String email;
    Address address;
    String phone;
    String website;
    Company company;
    
    factory User.fromJson(Map<String,dynamic> json) => _$UserFromJson(json);
    Map<String, dynamic> toJson() => _$UserToJson(this);
}

One last one is we see that we have the list of users, so we need to generate a model for the ‘users’ array.

Create a new file ‘users.json’ and update it like this

{
    "users": "$[]user"
}

Running the command again should generate users.dart.

part 'users.g.dart';

@JsonSerializable()
class Users {
  Users();

  List<User> users;

  factory Users.fromJson(Map<String, dynamic> json) => _$UsersFromJson(json);
  Map<String, dynamic> toJson() => _$UsersToJson(this);

}

Parse the Url

Create a file named “Services.dart” and copy the below contents.

This will parse the response and get the users list.

import 'dart:convert';
import 'package:http/http.dart' as http;
import '../../models/user.dart';
import '../../models/users.dart';

class Services {
  static const String url = 'https://jsonplaceholder.typicode.com/users';

  static Future<Users> getUsers() async {
    try {
      final response = await http.get(url);
      if (200 == response.statusCode) {
        return parseUsers(response.body);
      } else {
        return Users();
      }
    } catch (e) {
      print('Error ${e.toString()}');
      return Users();
    }
  }

  static Users parseUsers(String responseBody) {
    final parsed = json.decode(responseBody).cast<Map<String, dynamic>>();
    List<User> users = parsed.map<User>((json) => User.fromJson(json)).toList();
    Users u = Users();
    u.users = users;
    return u;
  }
}

Now We will create a list and add a TextField to Search through the list.


Add the Delay for Searching

We want to search the list when the user types in the TextField, but we don’t want to do it in every key stroke, instead we will wait for the user to stop typing and search.

For that we will write a separate class.

In this class, we will use a timer to cancel the search and start the search.

class Debouncer {
  final int milliseconds;
  VoidCallback action;
  Timer _timer;

  Debouncer({this.milliseconds});

  run(VoidCallback action) {
    if (null != _timer) {
      _timer.cancel();
    }
    _timer = Timer(Duration(milliseconds: milliseconds), action);
  }
}

Below is the function we use to search through the list. You can call this function in the onChange event of the TextField.

static Users filterList(Users users, String filterString) {
    Users tempUsers = users;
    List<User> _users = tempUsers.users
        .where((u) =>
            (u.name.toLowerCase().contains(filterString.toLowerCase())) ||
            (u.email.toLowerCase().contains(filterString.toLowerCase())))
        .toList();
    users.users = _users;
    return users;
}

Complete Code

Here is the complete UI code.

import 'package:flutter/material.dart';
import 'dart:async';
import 'Services.dart';
import '../../models/users.dart';

class UserListDemo extends StatefulWidget {
  UserListDemo() : super();

  final String title = "Filter List Demo";

  @override
  UserListDemoState createState() => UserListDemoState();
}

class Debouncer {
  final int milliseconds;
  VoidCallback action;
  Timer _timer;

  Debouncer({this.milliseconds});

  run(VoidCallback action) {
    if (null != _timer) {
      _timer.cancel();
    }
    _timer = Timer(Duration(milliseconds: milliseconds), action);
  }
}

class UserListDemoState extends State<UserListDemo> {
  //
  final debouncer = Debouncer(milliseconds: 1000);
  Users users;
  String title;

  @override
  void initState() {
    super.initState();
    title = 'Loading users...';
    users = Users();
    Services.getUsers().then((usersFromServer) {
      setState(() {
        users = usersFromServer;
        title = widget.title;
      });
    });
  }

  Widget list() {
    return Expanded(
      child: ListView.builder(
        itemCount: users.users == null ? 0 : users.users.length,
        itemBuilder: (BuildContext context, int index) {
          return row(index);
        },
      ),
    );
  }

  Widget row(int index) {
    return Card(
      child: Padding(
        padding: EdgeInsets.all(10.0),
        child: Column(
          mainAxisAlignment: MainAxisAlignment.start,
          crossAxisAlignment: CrossAxisAlignment.start,
          children: <Widget>[
            Text(
              users.users[index].name,
              style: TextStyle(
                fontSize: 16.0,
                color: Colors.black,
              ),
            ),
            SizedBox(
              height: 5.0,
            ),
            Text(
              users.users[index].email.toLowerCase(),
              style: TextStyle(
                fontSize: 14.0,
                color: Colors.grey,
              ),
            ),
          ],
        ),
      ),
    );
  }

  Widget searchTF() {
    return TextField(
      decoration: InputDecoration(
        border: OutlineInputBorder(
          borderRadius: const BorderRadius.all(
            const Radius.circular(
              5.0,
            ),
          ),
        ),
        filled: true,
        fillColor: Colors.white60,
        contentPadding: EdgeInsets.all(15.0),
        hintText: 'Filter by name or email',
      ),
      onChanged: (string) {
        debouncer.run(() {
          setState(() {
            title = 'Searching...';
          });
          Services.getUsers().then((usersFromServer) {
            setState(() {
              users = Users.filterList(usersFromServer, string);
              title = widget.title;
            });
          });
        });
      },
    );
  }

  @override
  Widget build(BuildContext context) {
    return Scaffold(
      appBar: AppBar(
        title: Text(title),
      ),
      body: Container(
        padding: EdgeInsets.all(10.0),
        child: Column(
          children: <Widget>[
            searchTF(),
            SizedBox(
              height: 10.0,
            ),
            list(),
          ],
        ),
      ),
    );
  }
}

Offline Database from WebService using SQFlite in Flutter

$
0
0

We are going to create an Offline Database using data from a Webservice.

Watch Video Tutorial

We are going to use the below service for that.

https://jsonplaceholder.typicode.com/photos

This service has about 5000 records, we are going to parse these records and insert all the records into the Offline SQLite database.


Generate JSON Models

To create json models, make sure you follow my previous post or you can watch my Youtube Video below.


Our model names will be ‘album’ and ‘albums’.

album will have the below record

{
    "albumId": 1,
    "id": 1,
    "title": "accusamus beatae ad facilis cum similique qui sunt",
    "url": "https://via.placeholder.com/600/92c952",
    "thumbnailUrl": "https://via.placeholder.com/150/92c952"
}

and albums will be list of albums.

Once we have the generated Json Models, we will Create the Offline Database and do the CRUD Operations.


CRUD Operations

Create a file named “DBHelper.dart” and initialize the database.

import 'dart:async';
import 'dart:io' as io;
import 'package:path/path.dart';
import 'package:sqflite/sqflite.dart';
import 'package:path_provider/path_provider.dart';
import '../../models/album.dart';
import '../../models/albums.dart';

class DBHelper {
  static Database _db;
  // Create the Table colums
  static const String TABLE = 'albums';
  static const String ALBUM_ID = 'albumId';
  static const String ID = 'id';
  static const String TITLE = 'title';
  static const String URL = 'url';
  static const String THUMBNAIL_URL = 'thumbnailUrl';
  static const String DB_NAME = 'albums.db';

  // Initialize the Database
  Future<Database> get db async {
    if (null != _db) {
      return _db;
    }
    _db = await initDb();
    return _db;
  }

  initDb() async {
    // Get the Device's Documents directory to store the Offline Database...
    io.Directory documentsDirectory = await getApplicationDocumentsDirectory();
    String path = join(documentsDirectory.path, DB_NAME);
    var db = await openDatabase(path, version: 1, onCreate: _onCreate);
    return db;
  }

  _onCreate(Database db, int version) async {
    // Create the DB Table
    await db.execute(
        "CREATE TABLE $TABLE ($ID INTEGER PRIMARY KEY, $ALBUM_ID TEXT, $TITLE TEXT, $URL TEXT, $THUMBNAIL_URL TEXT)");
  }

  // Method to insert the Album record to the Database
  Future<Album> save(Album album) async {
    var dbClient = await db;
    // this will insert the Album object to the DB after converting it to a json
    album.id = await dbClient.insert(TABLE, album.toJson());
    return album;
  }

  // Method to return all Albums from the DB
  Future<Albums> getAlbums() async {
    var dbClient = await db;
    // specify the column names you want in the result set
    List<Map> maps =
        await dbClient.query(TABLE, columns: [ID, TITLE, URL, THUMBNAIL_URL]);
    Albums allAlbums = Albums();
    List<Album> albums = [];
    if (maps.length > 0) {
      for (int i = 0; i < maps.length; i++) {
        albums.add(Album.fromJson(maps[i]));
      }
    }
    allAlbums.albums = albums;
    return allAlbums;
  }

  // Method to delete an Album from the Database
  Future<int> delete(int id) async {
    var dbClient = await db;
    return await dbClient.delete(TABLE, where: '$ID = ?', whereArgs: [id]);
  }

  // Method to Update an Album in the Database
  Future<int> update(Album album) async {
    var dbClient = await db;
    return await dbClient
        .update(TABLE, album.toJson(), where: '$ID = ?', whereArgs: [album.id]);
  }

  // Method to Truncate the Table
  Future<void> truncateTable() async {
    var dbClient = await db;
    return await dbClient.delete(TABLE);
  }

  // Method to Close the Database
  Future close() async {
    var dbClient = await db;
    dbClient.close();
  }
}

Service

Now we will write the service to parse the data.

import 'dart:convert';
import 'package:http/http.dart' as http;
import '../../models/album.dart';
import '../../models/albums.dart';

class Services {
  //
  static List<Album> albums;
  static const String url = 'https://jsonplaceholder.typicode.com/photos';

  static Future<Albums> getPhotos() async {
    try {
      final response = await http.get(url);
      if (200 == response.statusCode) {
        Albums albums = parsePhotos(response.body);
        return albums;
      } else {
        Albums albums = new Albums();
        albums.albums = [];
        return albums; // we are returning empty album list
        // Handle these as you want...
      }
    } catch (e) {
      Albums albums = new Albums();
      albums.albums = [];
      return albums;
    }
  }

  static Albums parsePhotos(String responseBody) {
    final parsed = json.decode(responseBody).cast<Map<String, dynamic>>();
    List<Album> albums =
        parsed.map<Album>((json) => Album.fromJson(json)).toList();
    Albums a = new Albums();
    a.albums = albums;
    return a;
  }
}

Show Data in a GridView

First we will create the cell for the GridView.

Create a file named “GridCell.dart” and copy the below code.

import 'package:flutter/material.dart';
import '../../models/album.dart';

class AlbumCell extends StatelessWidget {
  // Pass the Update and Delete Function as Constructor Parameter
  const AlbumCell(this.album, this.updateFunction, this.deleteFunction);

  @required
  final Album album;
  final Function updateFunction;
  final Function deleteFunction;

  @override
  Widget build(BuildContext context) {
    return Card(
      shape: RoundedRectangleBorder(
        borderRadius: BorderRadius.circular(10.0),
      ),
      color: Colors.white,
      child: Padding(
        padding: EdgeInsets.all(0.0),
        child: Container(
          decoration: BoxDecoration(
            image: DecorationImage(
              image: NetworkImage(album.url),
              fit: BoxFit.cover,
            ),
          ),
          alignment: Alignment.bottomCenter,
          child: Column(
            crossAxisAlignment: CrossAxisAlignment.center,
            mainAxisAlignment: MainAxisAlignment.center,
            mainAxisSize: MainAxisSize.min,
            children: <Widget>[
              Padding(
                padding: EdgeInsets.all(10.0),
                child: Text(
                  '${album.title}',
                  maxLines: 1,
                  softWrap: true,
                  textAlign: TextAlign.center,
                  style: TextStyle(
                    fontSize: 20.0,
                    color: Colors.white,
                    fontWeight: FontWeight.w500,
                  ),
                ),
              ),
              Padding(
                padding: EdgeInsets.all(10.0),
                child: Text(
                  '${album.id}', // show the Album id
                  maxLines: 1,
                  softWrap: true,
                  textAlign: TextAlign.center,
                  style: TextStyle(
                    fontSize: 20.0,
                    color: Colors.white,
                    fontWeight: FontWeight.w500,
                  ),
                ),
              ),
              // Add two more buttons for Update and Delete
              Row(
                crossAxisAlignment: CrossAxisAlignment.end,
                mainAxisAlignment: MainAxisAlignment.center,
                children: <Widget>[
                  FlatButton(
                    color: Colors.green,
                    child: Text(
                      'UPDATE',
                      style: TextStyle(
                        fontSize: 14.0,
                        fontWeight: FontWeight.w500,
                        color: Colors.white,
                      ),
                    ),
                    onPressed: () {
                      album.title = '${album.id} Updated';
                      updateFunction(album);
                    },
                  ),
                  FlatButton(
                    color: Colors.red,
                    child: Text(
                      'DELETE',
                      style: TextStyle(
                        fontSize: 14.0,
                        fontWeight: FontWeight.w500,
                        color: Colors.white,
                      ),
                    ),
                    onPressed: () {
                      deleteFunction(album.id);
                    },
                  )
                ],
              ),
            ],
          ),
        ),
      ),
    );
  }
}

Code for adding the GridView.


 gridview(AsyncSnapshot<Albums> snapshot) {
    return Padding(
      padding: EdgeInsets.all(5.0),
      child: GridView.count(
        crossAxisCount: 2,
        childAspectRatio: 1.0,
        mainAxisSpacing: 4.0,
        crossAxisSpacing: 4.0,
        children: snapshot.data.albums.map((album) {
          return GridTile(
            child: AlbumCell(album, update, delete),
          );
        }).toList(),
      ),
    );
  }

  // Get the Records from the Service and insert into the database.
  getPhotos() {
    setState(() {
      counter = 0;
      albumsLoaded = false;
    });
    Services.getPhotos().then((allAlbums) {
      albums = allAlbums;
      // Now we got all the albums from the Service...
      // We will insert each album one by one into the Database...
      // On Each load, we will truncate the table
      dbHelper.truncateTable().then((val) {
        // Write a recursive function to insert all the albums
        insert(albums.albums[0]);
      });
    });
  }

  // recursive function to insert record one by one to the database.
  insert(Album album) {
    dbHelper.save(album).then((val) {
      counter = counter + 1;
      // we are calculating the percent here on insert of each record
      percent = ((counter / albums.albums.length) * 100) /
          100; // percent from 0 to 1...
      // terminate condition for this recursive function
      if (counter >= albums.albums.length) {
        // when inserting is done
        setState(() {
          albumsLoaded = true;
          percent = 0.0;
          title = '${widget.title} [$counter]';
        });
        return;
      }
      setState(() {
        title = 'Inserting...$counter';
      });
      Album a = albums.albums[counter];
      insert(a);
    });
  }


  // Update Function
  update(Album album) {
    // We are updating the album title on each update
    dbHelper.update(album).then((updtVal) {
      showSnackBar('Updated ${album.id}');
      refresh();
    });
  }

  // Delete Function
  delete(int id) {
    dbHelper.delete(id).then((delVal) {
      showSnackBar('Deleted $id');
      refresh();
    });
  }

  // Method to refresh the List after the DB Operations
  refresh() {
    dbHelper.getAlbums().then((allAlbums) {
      setState(() {
        albums = allAlbums;
        counter = albums.albums.length;
        title = '${widget.title} [$counter]'; // updating the title
      });
    });
  }

  // Show a Snackbar
  showSnackBar(String message) {
    scaffoldKey.currentState.showSnackBar(SnackBar(
      content: Text(message),
    ));
  }

Complete Code

import 'package:flutter/material.dart';
import 'Services.dart';
import '../../models/album.dart';
import '../../models/albums.dart';
import 'DBHelper.dart';
import 'GridCell.dart';

class GridViewDemo extends StatefulWidget {
  GridViewDemo() : super();

  final String title = "Photos";

  @override
  GridViewDemoState createState() => GridViewDemoState();
}

// Add two plugins
// One for Http and other for getting the Device Directories
// Go to pubspec.yaml file

// Let me show the service url we are going to use
// https://jsonplaceholder.typicode.com/photos
// In this service we have 5000 records or albums
// Let's create the model classes first.
// For that we need some plugins..let me show those...

// To Auto-generate Json Models, we need to create a folder named
// 'jsons' in the root of the project. You can have different name as well,
// in that case the folder name should be specified along with the command
// in the terminal...

// Let's create the folder first
// Now copy the json you want to create model for...

// We will run a command in the terminal to generate the model,
// the generated models will be inside a folder named 'models' inside the 'lib' folder.
// Let's see how to do it...
// I am already having the 'models' folder which I created for other tutorials...

// You can watch my other tutorial on generating json models by clicking the 'i' button above
// or the link is provided in the description

// Now we have the basic model
// But we have a list of Albums, so create another model

// Ok Now we have both models for this demo...

// Now we will add the Sqflite library to create an offline database
// Link to all libraries used is provided in the description below.
// Let's write the basic CRUD operations for saving the albums in the Offline Database...

// Now we will write the Service Class to get the Data from the service.
// Add the Http Plugin...

// We will use these Database functions now to do the DB operations

// Now we will add a progressbar while inserting the album records

// Seems like my system is running bit slow...Sorry for that

class GridViewDemoState extends State<GridViewDemo> {
  //
  int counter;
  static Albums albums;
  DBHelper dbHelper;
  bool albumsLoaded;
  String title; // Title for the AppBar where we will show the progress...
  double percent;
  GlobalKey<ScaffoldState> scaffoldKey;

  @override
  void initState() {
    super.initState();
    counter = 0;
    percent = 0.0;
    title = widget.title;
    albumsLoaded = false;
    scaffoldKey = GlobalKey();
    dbHelper = DBHelper();
  }

  getPhotos() {
    setState(() {
      counter = 0;
      albumsLoaded = false;
    });
    Services.getPhotos().then((allAlbums) {
      albums = allAlbums;
      // Now we got all the albums from the Service...
      // We will insert each album one by one into the Database...
      // On Each load, we will truncate the table
      dbHelper.truncateTable().then((val) {
        // Write a recursive function to insert all the albums
        insert(albums.albums[0]);
      });
    });
  }

  insert(Album album) {
    dbHelper.save(album).then((val) {
      counter = counter + 1;
      // we are calculating the percent here on insert of each record
      percent = ((counter / albums.albums.length) * 100) /
          100; // percent from 0 to 1...
      // terminate condition for this recursive function
      if (counter >= albums.albums.length) {
        // when inserting is done
        setState(() {
          albumsLoaded = true;
          percent = 0.0;
          title = '${widget.title} [$counter]';
        });
        return;
      }
      setState(() {
        title = 'Inserting...$counter';
      });
      Album a = albums.albums[counter];
      insert(a);
    });
  }

  gridview(AsyncSnapshot<Albums> snapshot) {
    return Padding(
      padding: EdgeInsets.all(5.0),
      child: GridView.count(
        crossAxisCount: 2,
        childAspectRatio: 1.0,
        mainAxisSpacing: 4.0,
        crossAxisSpacing: 4.0,
        children: snapshot.data.albums.map((album) {
          return GridTile(
            child: AlbumCell(album, update, delete),
          );
        }).toList(),
      ),
    );
  }

  // Update Function
  update(Album album) {
    // We are updating the album title on each update
    dbHelper.update(album).then((updtVal) {
      showSnackBar('Updated ${album.id}');
      refresh();
    });
  }

  // Delete Function
  delete(int id) {
    dbHelper.delete(id).then((delVal) {
      showSnackBar('Deleted $id');
      refresh();
    });
  }

  // Method to refresh the List after the DB Operations
  refresh() {
    dbHelper.getAlbums().then((allAlbums) {
      setState(() {
        albums = allAlbums;
        counter = albums.albums.length;
        title = '${widget.title} [$counter]'; // updating the title
      });
    });
  }

  // Show a Snackbar
  showSnackBar(String message) {
    scaffoldKey.currentState.showSnackBar(SnackBar(
      content: Text(message),
    ));
  }

  // We will create a GridView to show the Data...
  // Before that we will create the class from each Cell in the GridView
  // Add a Gridview to the UI

  @override
  Widget build(BuildContext context) {
    return Scaffold(
      key: scaffoldKey,
      appBar: AppBar(
        title: Text(title),
        // Add action buttons in the AppBar
        actions: <Widget>[
          IconButton(
            icon: Icon(Icons.file_download),
            onPressed: () {
              getPhotos();
            },
          ),
        ],
      ),
      body: Column(
        mainAxisAlignment: MainAxisAlignment.start,
        crossAxisAlignment: CrossAxisAlignment.start,
        mainAxisSize: MainAxisSize.min,
        children: <Widget>[
          albumsLoaded
              ? Flexible(
                  child: FutureBuilder<Albums>(
                    future: dbHelper.getAlbums(),
                    builder: (context, snapshot) {
                      if (snapshot.hasError) {
                        return Text('Error ${snapshot.error}');
                      }
                      if (snapshot.hasData) {
                        return gridview(snapshot);
                      }
                      // if still loading return an empty container
                      return Container();
                    },
                  ),
                )
              : LinearProgressIndicator(
                  value: percent,
                ),
        ],
      ),
    );
  }
}


Performance programming in Flutter using Isolates

$
0
0

Flutter Isolates

Flutter Isolates


Watch Video Tutorial


As you all know Flutter is a single threaded App platform. So then

  • How to do multithreading ?.
  • How to execute heavy operations in one thread ?.
  • How to run big operations without affecting the UI ?.

But yes, all these can be achieved with the help of Isolates.


What are Isolates?

Isolates are similar to threads in UNIX, but there is a difference.
Like threads, Isolates don’t share memory. Isolates communicate with the help of messages.

A Flutter app is running in a single Isolate. So if we run a heavy operation in this thread, it’s definitely going to block the UI
and ruin the User experience. Isolates comes to help in this case.

The two ways to use Isolates

1. Using the ‘compute’ function in the Isolates package (High Level convenient function).
2. Using the SendPort and Receive Port for message passing (Low-level APIs).


So lets start…

For this example, I will be creating an animation widget which runs in the UI while we run the heavy operation in the Isolate.

create a class named ‘AnimationWidget‘.

We are going to animate only the border of this widget.

Here is the complete AnimationWidget code

class AnimationWidget extends StatefulWidget {
  @override
  AnimationWidgetState createState() {
    return AnimationWidgetState();
  }
}

class AnimationWidgetState extends State<AnimationWidget>
    with TickerProviderStateMixin {
  //
  AnimationController _animationController;
  Animation<BorderRadius> _borderRadius;

  @override
  void initState() {
    super.initState();
    _animationController =
        AnimationController(duration: const Duration(seconds: 1), vsync: this)
          ..addStatusListener((status) {
            if (status == AnimationStatus.completed) {
              _animationController.reverse();
            } else if (status == AnimationStatus.dismissed) {
              _animationController.forward();
            }
          });

    _borderRadius = BorderRadiusTween(
      begin: BorderRadius.circular(100.0),
      end: BorderRadius.circular(0.0),
    ).animate(CurvedAnimation(
      parent: _animationController,
      curve: Curves.linear,
    ));

    _animationController.forward();
  }

  @override
  Widget build(BuildContext context) {
    return AnimatedBuilder(
      animation: _borderRadius,
      builder: (context, child) {
        return Center(
          child: Container(
            child: FlutterLogo(
              size: 200,
            ),
            alignment: Alignment.bottomCenter,
            width: 350,
            height: 200,
            decoration: BoxDecoration(
              gradient: LinearGradient(
                begin: Alignment.topLeft,
                colors: [Colors.blueAccent, Colors.redAccent],
              ),
              borderRadius: _borderRadius.value,
            ),
          ),
        );
      },
    );
  }

  @override
  void dispose() {
    _animationController.dispose();
    super.dispose();
  }
}

BorderRadiusTween is used to animate the Border of the Widget. Here we are reversing the animation when it completes, making it run infinitely.


Using Isolates

Declare a future which is the future for the Isolate.

Future<void> computeFuture = Future.value();

We will add two buttons one executes a long running operation on the Main Isolate thread and other in a Seperate Isolate thread.

 addButton1() {
    return FutureBuilder<void>(
      future: computeFuture,
      builder: (context, snapshot) {
        return OutlineButton(
          child: const Text('Main Isolate'),
          onPressed: createMainIsolateCallback(context, snapshot),
        );
      },
    );
}
addButton2() {
    return FutureBuilder<void>(
      future: computeFuture,
      builder: (context, snapshot) {
        return OutlineButton(
          child: const Text('Secondary Isolate'),
          onPressed: createSecondaryIsolateCallback(context, snapshot),
        );
      },
    );
}

Here are the callback functions.


VoidCallback createMainIsolateCallback(
    BuildContext context, AsyncSnapshot snapshot) {
  if (snapshot.connectionState == ConnectionState.done) {
    return () {
      setState(() {
        computeFuture = computeOnMainIsolate().then((val) {
          showSnackBar(context, 'Main Isolate Done $val');
        });
      });
    };
  } else {
    return null;
  }
}

VoidCallback createSecondaryIsolateCallback(
    BuildContext context, AsyncSnapshot snapshot) {
  if (snapshot.connectionState == ConnectionState.done) {
    return () {
      setState(() {
        computeFuture = computeOnSecondaryIsolate().then((val) {
          showSnackBar(context, 'Secondary Isolate Done $val');
        });
      });
    };
  } else {
    return null;
  }
}

Future<int> computeOnMainIsolate() async {
  return await Future.delayed(Duration(milliseconds: 100), () => fib(40));
}

Future<int> computeOnSecondaryIsolate() async {
  return await compute(fib, 40);
}

showSnackBar(context, message) {
  Scaffold.of(context).showSnackBar(SnackBar(
    content: Text(message),
  ));
}

We are using a Fibonacci function to do a long running operation.

int fib(int n) {
  int number1 = n - 1;
  int number2 = n - 2;
  if (0 == n) {
    return 0;
  } else if (0 == n) {
    return 1;
  } else {
    return (fib(number1) + fib(number2));
  }
}

The ‘computeOnMainIsolate‘ function will create a Delayed Future that runs on the Main Isolate thread.
The ‘computeOnSecondaryIsolate‘ uses the ‘compute’ function that creates a new Isolate. The new Isolate will accept the function and the parameters.

We pass in the Fibonacci function and the parameters to it.

Finally we are showing the result in a SnackBar.


If you run the application and run the MainIsolate, you will see that it freezes the Animation and the UI until it completes. But if we run the Secondary Isolate, we will see that the animation runs smoothly all the time it is running. That means, the ‘compute’ is spawning a new isolate and running the code there. So it doesn’t affect the running of the Main Isolate and the UI will be smooth and responsive.


Watch the complete Youtube Tutorial above to see it in action.

Here is the complete example.

import 'package:flutter/foundation.dart';
import 'package:flutter/material.dart';

class PerformancePage extends StatefulWidget {
  @override
  _PerformancePageState createState() => _PerformancePageState();
}

class _PerformancePageState extends State<PerformancePage> {
  //
  Future<void> computeFuture = Future.value();

  @override
  Widget build(BuildContext context) {
    return Scaffold(
      appBar: AppBar(
        title: Text('Performance using Isolate'),
      ),
      body: Container(
        color: Colors.white,
        child: Center(
          child: Column(
            mainAxisSize: MainAxisSize.min,
            children: <Widget>[
              AnimationWidget(),
              addButton1(),
              addButton2(),
            ],
          ),
        ),
      ),
    );
  }

  addButton1() {
    return FutureBuilder<void>(
      future: computeFuture,
      builder: (context, snapshot) {
        return OutlineButton(
          child: const Text('Main Isolate'),
          onPressed: createMainIsolateCallback(context, snapshot),
        );
      },
    );
  }

  addButton2() {
    return FutureBuilder<void>(
      future: computeFuture,
      builder: (context, snapshot) {
        return OutlineButton(
          child: const Text('Secondary Isolate'),
          onPressed: createSecondaryIsolateCallback(context, snapshot),
        );
      },
    );
  }

  VoidCallback createMainIsolateCallback(
      BuildContext context, AsyncSnapshot snapshot) {
    if (snapshot.connectionState == ConnectionState.done) {
      return () {
        setState(() {
          computeFuture = computeOnMainIsolate().then((val) {
            showSnackBar(context, 'Main Isolate Done $val');
          });
        });
      };
    } else {
      return null;
    }
  }

  VoidCallback createSecondaryIsolateCallback(
      BuildContext context, AsyncSnapshot snapshot) {
    if (snapshot.connectionState == ConnectionState.done) {
      return () {
        setState(() {
          computeFuture = computeOnSecondaryIsolate().then((val) {
            showSnackBar(context, 'Secondary Isolate Done $val');
          });
        });
      };
    } else {
      return null;
    }
  }

  Future<int> computeOnMainIsolate() async {
    return await Future.delayed(Duration(milliseconds: 100), () => fib(40));
  }

  Future<int> computeOnSecondaryIsolate() async {
    return await compute(fib, 40);
  }

  showSnackBar(context, message) {
    Scaffold.of(context).showSnackBar(SnackBar(
      content: Text(message),
    ));
  }
}

int fib(int n) {
  int number1 = n - 1;
  int number2 = n - 2;
  if (0 == n) {
    return 0;
  } else if (1 == n) {
    return 1;
  } else {
    return (fib(number1) + fib(number2));
  }
}

class AnimationWidget extends StatefulWidget {
  @override
  AnimationWidgetState createState() {
    return AnimationWidgetState();
  }
}

class AnimationWidgetState extends State<AnimationWidget>
    with TickerProviderStateMixin {
  //
  AnimationController _animationController;
  Animation<BorderRadius> _borderRadius;

  @override
  void initState() {
    super.initState();
    _animationController =
        AnimationController(duration: const Duration(seconds: 1), vsync: this)
          ..addStatusListener((status) {
            if (status == AnimationStatus.completed) {
              _animationController.reverse();
            } else if (status == AnimationStatus.dismissed) {
              _animationController.forward();
            }
          });

    _borderRadius = BorderRadiusTween(
      begin: BorderRadius.circular(100.0),
      end: BorderRadius.circular(0.0),
    ).animate(CurvedAnimation(
      parent: _animationController,
      curve: Curves.linear,
    ));

    _animationController.forward();
  }

  @override
  Widget build(BuildContext context) {
    return AnimatedBuilder(
      animation: _borderRadius,
      builder: (context, child) {
        return Center(
          child: Container(
            child: FlutterLogo(
              size: 200,
            ),
            alignment: Alignment.bottomCenter,
            width: 350,
            height: 200,
            decoration: BoxDecoration(
              gradient: LinearGradient(
                begin: Alignment.topLeft,
                colors: [Colors.blueAccent, Colors.redAccent],
              ),
              borderRadius: _borderRadius.value,
            ),
          ),
        );
      },
    );
  }

  @override
  void dispose() {
    _animationController.dispose();
    super.dispose();
  }
}

Note: Isolates only accept functions that are either static or the method should not be a part of a class instance.

Thanks for reading, if you found my post useful, please leave your valuable comments below and subscribe to my youtube channel for more videos.

Working With Low-Level Isolate APIs in Flutter

$
0
0

Hi

Isolates Performance

Isolates Performance

In my previous video I explained about how to use Isolates at a high level.
Using high-level APIs has some disadvantages though.

Watch Video Tutorial


Bu using Low-level APIs over the High-level compute function you can get more control over the isolates.
You can pause, resume and stop the Isolates at any point of time which is not possible with ‘compute’ function.

Let’s see how we can do those.

Here I am creating a custom class to sent data to Isolates. I am calling it ThreadParams.

 class ThreadParams {
  ThreadParams(this.val, this.sendPort);
  int val;
  SendPort sendPort;
}

Here you can see one of the parameter is a SendPort. This is the port through with the isolate communicates
with the calling Isolate.

There is another class called ReceivePort through which the calling Isolate class gets the data back.


Start Isolate Thread

So this is how the start method will look like.

  Isolate _isolate;
  bool _running = false;
  ReceivePort _receivePort;
  Capability _capability;

  void _start() async {
    if (_running) {
      return;
    }
    setState(() {
      _running = true;
    });
    _receivePort = ReceivePort();
    ThreadParams threadParams = ThreadParams(2000, _receivePort.sendPort);
    _isolate = await Isolate.spawn(
      _isolateHandler,
      threadParams,
    );
    _receivePort.listen(_handleMessage, onDone: () {
      setState(() {
        _threadStatus = 'Stopped';
      });
    });
}

Isolate.spawn will create a new Isolate thread. The calling methods listens to the messages from
the _isolate wit _receivePort.listen which has a function that receives the message.

The _handleMessage can be a simple function like this.

void _handleMessage(dynamic data) {
    print(data.toString());
}

_isolateHandler method is the entry method of the _isolate and it should a either a static method or it should not a method inside a class.


So below is the _isolateHandler with the heavy operation methods that we are going to do inside the _isolate thread.

static void _isolateHandler(ThreadParams threadParams) async {
    heavyOperation(threadParams);
  }

  static void heavyOperation(ThreadParams threadParams) async {
    int count = 10000;
    while (true) {
      int sum = 0;
      for (int i = 0; i < count; i++) {
        sum += await computeSum(1000);
      }
      count += threadParams.val;
      threadParams.sendPort.send(sum.toString());
    }
  }

  static Future<int> computeSum(int num) {
    Random random = Random();
    return Future(() {
      int sum = 0;
      for (int i = 0; i < num; i++) {
        sum += random.nextInt(100);
      }
      return sum;
    });
  }

Pause, Resume and Stop Isolates


  void _pause() {
    if (null != _isolate) {
      _paused ? _isolate.resume(_capability) : _capability = _isolate.pause();
      setState(() {
        _paused = !_paused;
        _threadStatus = _paused ? 'Paused' : 'Resumed';
      });
    }
  }

  void _stop() {
    if (null != _isolate) {
      setState(() {
        _running = false;
      });
      _receivePort.close();
      _isolate.kill(priority: Isolate.immediate);
      _isolate = null;
    }
  }

Here the main thing to understand is that to pause the Isolate is that to resume an isolate, We need a Capability object which we can get whiile pausing the Isolate. The Isolate pause will return a Capability which can be used to resume that Isolate.


Send messages

threadParams.sendPort.send(sum.toString());

SendPort.send is used to send a message back to the Calling Isolate. By Calling Isolate i mean here the Main Isolate in which the Flutter app is running.

So thats the basics.

Here is the complete example.


Complete Example

import 'package:flutter/material.dart';
import 'dart:isolate';
import 'dart:math';
import 'dart:async';

class PerformancePage extends StatefulWidget {
  final String title = "Isolates Demo";

  @override
  _PerformancePageState createState() => _PerformancePageState();
}

class _PerformancePageState extends State<PerformancePage> {
  //
  Isolate _isolate;
  bool _running = false;
  bool _paused = false;
  String _message = '';
  String _threadStatus = '';
  ReceivePort _receivePort;
  Capability _capability;

  void _start() async {
    if (_running) {
      return;
    }
    setState(() {
      _running = true;
      _message = 'Starting...';
      _threadStatus = 'Running...';
    });
    _receivePort = ReceivePort();
    ThreadParams threadParams = ThreadParams(2000, _receivePort.sendPort);
    _isolate = await Isolate.spawn(
      _isolateHandler,
      threadParams,
    );
    _receivePort.listen(_handleMessage, onDone: () {
      setState(() {
        _threadStatus = 'Stopped';
      });
    });
  }

  void _pause() {
    if (null != _isolate) {
      _paused ? _isolate.resume(_capability) : _capability = _isolate.pause();
      setState(() {
        _paused = !_paused;
        _threadStatus = _paused ? 'Paused' : 'Resumed';
      });
    }
  }

  void _stop() {
    if (null != _isolate) {
      setState(() {
        _running = false;
      });
      _receivePort.close();
      _isolate.kill(priority: Isolate.immediate);
      _isolate = null;
    }
  }

  void _handleMessage(dynamic data) {
    setState(() {
      _message = data;
    });
  }

  static void _isolateHandler(ThreadParams threadParams) async {
    heavyOperation(threadParams);
  }

  static void heavyOperation(ThreadParams threadParams) async {
    int count = 10000;
    while (true) {
      int sum = 0;
      for (int i = 0; i < count; i++) {
        sum += await computeSum(1000);
      }
      count += threadParams.val;
      threadParams.sendPort.send(sum.toString());
    }
  }

  static Future<int> computeSum(int num) {
    Random random = Random();
    return Future(() {
      int sum = 0;
      for (int i = 0; i < num; i++) {
        sum += random.nextInt(100);
      }
      return sum;
    });
  }

  @override
  Widget build(BuildContext context) {
    return new Scaffold(
      appBar: new AppBar(
        title: new Text(widget.title),
      ),
      body: new Container(
        padding: EdgeInsets.all(20.0),
        alignment: Alignment.center,
        child: new Column(
          children: <Widget>[
            !_running
                ? OutlineButton(
                    child: Text('Start Isolate'),
                    onPressed: () {
                      _start();
                    },
                  )
                : SizedBox(),
            _running
                ? OutlineButton(
                    child: Text(_paused ? 'Resume Isolate' : 'Pause Isolate'),
                    onPressed: () {
                      _pause();
                    },
                  )
                : SizedBox(),
            _running
                ? OutlineButton(
                    child: Text('Stop Isolate'),
                    onPressed: () {
                      _stop();
                    },
                  )
                : SizedBox(),
            SizedBox(
              height: 20.0,
            ),
            Text(
              _threadStatus,
              style: TextStyle(
                fontSize: 20.0,
              ),
            ),
            SizedBox(
              height: 20.0,
            ),
            Text(
              _message,
              style: TextStyle(
                fontSize: 20.0,
                color: Colors.green,
              ),
            ),
          ],
        ),
      ),
    );
  }
}

class ThreadParams {
  ThreadParams(this.val, this.sendPort);
  int val;
  SendPort sendPort;
}

Flutter DataTable + MySQL

$
0
0

In this demo we will create a flutter app that communicates with the Server and create a table, insert records, update records, fetch all records and delete records.

The Data from the Server will be displayed in a DataTable.


Flutter Data Table + MySQL

Flutter Data Table + MySQL


Watch Video Tutorial


Here I am using XAMPP to create a local Server.
You can download XAMPP from here.
https://www.apachefriends.org/download.html

If you want to learn using SQLite in Flutter, then follow this link.


Server Side

In the Server I am creating a script inside a folder named “EmployeesDB”.

We will we connecting to the database and do a insert, update, select and delete in the database.

The script will look like this

<?php

    $servername = "localhost";
    $username = "root";
    $password = "";
    $dbname = "TestDB";
    $table = "Employees"; // lets create a table named Employees.

    // we will get actions from the app to do operations in the database...
    $action = $_POST["action"];
    
    // Create Connection
    $conn = new mysqli($servername, $username, $password, $dbname);
    // Check Connection
    if($conn->connect_error){
        die("Connection Failed: " . $conn->connect_error);
        return;
    }

    // If connection is OK...

    // If the app sends an action to create the table...
    if("CREATE_TABLE" == $action){
        $sql = "CREATE TABLE IF NOT EXISTS $table ( 
            id INT(6) UNSIGNED AUTO_INCREMENT PRIMARY KEY,
            first_name VARCHAR(30) NOT NULL,
            last_name VARCHAR(30) NOT NULL
            )";

        if($conn->query($sql) === TRUE){
            // send back success message
            echo "success";
        }else{
            echo "error";
        }
        $conn->close();
        return;
    }

    // Get all employee records from the database
    if("GET_ALL" == $action){
        $db_data = array();
        $sql = "SELECT id, first_name, last_name from $table ORDER BY id DESC";
        $result = $conn->query($sql);
        if($result->num_rows > 0){
            while($row = $result->fetch_assoc()){
                $db_data[] = $row;
            }
            // Send back the complete records as a json
            echo json_encode($db_data);
        }else{
            echo "error";
        }
        $conn->close();
        return;
    }

    // Add an Employee
    if("ADD_EMP" == $action){
        // App will be posting these values to this server
        $first_name = $_POST["first_name"];
        $last_name = $_POST["last_name"];
        $sql = "INSERT INTO $table (first_name, last_name) VALUES ('$first_name', '$last_name')";
        $result = $conn->query($sql);
        echo "success";
        $conn->close();
        return;
    }

    // Remember - this is the server file.
    // I am updating the server file.
    // Update an Employee
    if("UPDATE_EMP" == $action){
        // App will be posting these values to this server
        $emp_id = $_POST['emp_id'];
        $first_name = $_POST["first_name"];
        $last_name = $_POST["last_name"];
        $sql = "UPDATE $table SET first_name = '$first_name', last_name = '$last_name' WHERE id = $emp_id";
        if($conn->query($sql) === TRUE){
            echo "success";
        }else{
            echo "error";
        }
        $conn->close();
        return;
    }

    // Delete an Employee
    if('DELETE_EMP' == $action){
        $emp_id = $_POST['emp_id'];
        $sql = "DELETE FROM $table WHERE id = $emp_id"; // don't need quotes since id is an integer.
        if($conn->query($sql) === TRUE){
            echo "success";
        }else{
            echo "error";
        }
        $conn->close();
        return;
    }

?>

Flutter Side

Now we have the server side ready. Next we will create the model class for the object coming from the Server.
Its an employee record which has an id, first_name and a last_name. You can look at the create table query in the php code above.

Now we will create a service class to call the Webs Services with the proper action like create, update etc.

Create a new file named Services.dart and copy this code into it.

import 'dart:convert';
import 'package:http/http.dart'
    as http; // add the http plugin in pubspec.yaml file.
import 'Employee.dart';

class Services {
  static const ROOT = 'http://localhost/EmployeesDB/employee_actions.php';
  static const _CREATE_TABLE_ACTION = 'CREATE_TABLE';
  static const _GET_ALL_ACTION = 'GET_ALL';
  static const _ADD_EMP_ACTION = 'ADD_EMP';
  static const _UPDATE_EMP_ACTION = 'UPDATE_EMP';
  static const _DELETE_EMP_ACTION = 'DELETE_EMP';

  // Method to create the table Employees.
  static Future<String> createTable() async {
    try {
      // add the parameters to pass to the request.
      var map = Map<String, dynamic>();
      map['action'] = _CREATE_TABLE_ACTION;
      final response = await http.post(ROOT, body: map);
      print('Create Table Response: ${response.body}');
      if (200 == response.statusCode) {
        return response.body;
      } else {
        return "error";
      }
    } catch (e) {
      return "error";
    }
  }

  static Future<List<Employee>> getEmployees() async {
    try {
      var map = Map<String, dynamic>();
      map['action'] = _GET_ALL_ACTION;
      final response = await http.post(ROOT, body: map);
      print('getEmployees Response: ${response.body}');
      if (200 == response.statusCode) {
        List<Employee> list = parseResponse(response.body);
        return list;
      } else {
        return List<Employee>();
      }
    } catch (e) {
      return List<Employee>(); // return an empty list on exception/error
    }
  }

  static List<Employee> parseResponse(String responseBody) {
    final parsed = json.decode(responseBody).cast<Map<String, dynamic>>();
    return parsed.map<Employee>((json) => Employee.fromJson(json)).toList();
  }

  // Method to add employee to the database...
  static Future<String> addEmployee(String firstName, String lastName) async {
    try {
      var map = Map<String, dynamic>();
      map['action'] = _ADD_EMP_ACTION;
      map['first_name'] = firstName;
      map['last_name'] = lastName;
      final response = await http.post(ROOT, body: map);
      print('addEmployee Response: ${response.body}');
      if (200 == response.statusCode) {
        return response.body;
      } else {
        return "error";
      }
    } catch (e) {
      return "error";
    }
  }

  // Method to update an Employee in Database...
  static Future<String> updateEmployee(
      String empId, String firstName, String lastName) async {
    try {
      var map = Map<String, dynamic>();
      map['action'] = _UPDATE_EMP_ACTION;
      map['emp_id'] = empId;
      map['first_name'] = firstName;
      map['last_name'] = lastName;
      final response = await http.post(ROOT, body: map);
      print('updateEmployee Response: ${response.body}');
      if (200 == response.statusCode) {
        return response.body;
      } else {
        return "error";
      }
    } catch (e) {
      return "error";
    }
  }

  // Method to Delete an Employee from Database...
  static Future<String> deleteEmployee(String empId) async {
    try {
      var map = Map<String, dynamic>();
      map['action'] = _DELETE_EMP_ACTION;
      map['emp_id'] = empId;
      final response = await http.post(ROOT, body: map);
      print('deleteEmployee Response: ${response.body}');
      if (200 == response.statusCode) {
        return response.body;
      } else {
        return "error";
      }
    } catch (e) {
      return "error"; // returning just an "error" string to keep this simple...
    }
  }
}

In the above code you can see that we are using the http package for service calls and the post parameters are sent in the form of a map.

To include the http package update your pubspec.yaml file like this

dependencies:
  flutter: 
    sdk: flutter

  http: "0.11.3+17" 
 ...

Let’s create the Main UI.

We will be displaying the employee list in a DataTable.

The below code will create a DataTable with columns ID, FIRST NAME, LAST NAME, DELETE (action).

 // Let's create a DataTable and show the employee list in it.
  SingleChildScrollView _dataBody() {
    // Both Vertical and Horozontal Scrollview for the DataTable to
    // scroll both Vertical and Horizontal...
    return SingleChildScrollView(
      scrollDirection: Axis.vertical,
      child: SingleChildScrollView(
        scrollDirection: Axis.horizontal,
        child: DataTable(
          columns: [
            DataColumn(
              label: Text('ID'),
            ),
            DataColumn(
              label: Text('FIRST NAME'),
            ),
            DataColumn(
              label: Text('LAST NAME'),
            ),
            // Lets add one more column to show a delete button
            DataColumn(
              label: Text('DELETE'),
            )
          ],
          rows: _employees
              .map(
                (employee) => DataRow(cells: [
                  DataCell(
                    Text(employee.id),
                    // Add tap in the row and populate the
                    // textfields with the corresponding values to update
                    onTap: () {
                      _showValues(employee);
                      // Set the Selected employee to Update
                      _selectedEmployee = employee;
                      setState(() {
                        _isUpdating = true;
                      });
                    },
                  ),
                  DataCell(
                    Text(
                      employee.firstName.toUpperCase(),
                    ),
                    onTap: () {
                      _showValues(employee);
                      // Set the Selected employee to Update
                      _selectedEmployee = employee;
                      // Set flag updating to true to indicate in Update Mode
                      setState(() {
                        _isUpdating = true;
                      });
                    },
                  ),
                  DataCell(
                    Text(
                      employee.lastName.toUpperCase(),
                    ),
                    onTap: () {
                      _showValues(employee);
                      // Set the Selected employee to Update
                      _selectedEmployee = employee;
                      setState(() {
                        _isUpdating = true;
                      });
                    },
                  ),
                  DataCell(IconButton(
                    icon: Icon(Icons.delete),
                    onPressed: () {
                      _deleteEmployee(employee);
                    },
                  ))
                ]),
              )
              .toList(),
        ),
      ),
    );
  }
  

The variable employees is initialized by getting employees from the service by calling the getEmployees() function in the Services class.The getEmployees() will return a json with fields id, first_name and last_name which will be mapped to the Employee object by using Employee.fromJson() method.

    _getEmployees() {
    _showProgress('Loading Employees...');
    Services.getEmployees().then((employees) {
      setState(() {
        _employees = employees;
      });
      _showProgress(widget.title); // Reset the title...
      print("Length ${employees.length}");
    });
  }
  

Similarly we can have Insert, Update and Delete actions.

The Complete UI will look like this…

import 'package:flutter/material.dart';
import 'Employee.dart';
import 'Services.dart';

class DataTableDemo extends StatefulWidget {
  //
  DataTableDemo() : super();

  final String title = 'Flutter Data Table';

  @override
  DataTableDemoState createState() => DataTableDemoState();
}

class DataTableDemoState extends State<DataTableDemo> {
  List<Employee> _employees;
  GlobalKey<ScaffoldState> _scaffoldKey;
  // controller for the First Name TextField we are going to create.
  TextEditingController _firstNameController;
  // controller for the Last Name TextField we are going to create.
  TextEditingController _lastNameController;
  Employee _selectedEmployee;
  bool _isUpdating;
  String _titleProgress;

  @override
  void initState() {
    super.initState();
    _employees = [];
    _isUpdating = false;
    _titleProgress = widget.title;
    _scaffoldKey = GlobalKey(); // key to get the context to show a SnackBar
    _firstNameController = TextEditingController();
    _lastNameController = TextEditingController();
    _getEmployees();
  }

  // Method to update title in the AppBar Title
  _showProgress(String message) {
    setState(() {
      _titleProgress = message;
    });
  }

  _showSnackBar(context, message) {
    _scaffoldKey.currentState.showSnackBar(
      SnackBar(
        content: Text(message),
      ),
    );
  }

  _createTable() {
    _showProgress('Creating Table...');
    Services.createTable().then((result) {
      if ('success' == result) {
        // Table is created successfully.
        _showSnackBar(context, result);
        _showProgress(widget.title);
      }
    });
  }

  // Now lets add an Employee
  _addEmployee() {
    if (_firstNameController.text.isEmpty || _lastNameController.text.isEmpty) {
      print('Empty Fields');
      return;
    }
    _showProgress('Adding Employee...');
    Services.addEmployee(_firstNameController.text, _lastNameController.text)
        .then((result) {
      if ('success' == result) {
        _getEmployees(); // Refresh the List after adding each employee...
        _clearValues();
      }
    });
  }

  _getEmployees() {
    _showProgress('Loading Employees...');
    Services.getEmployees().then((employees) {
      setState(() {
        _employees = employees;
      });
      _showProgress(widget.title); // Reset the title...
      print("Length ${employees.length}");
    });
  }

  _updateEmployee(Employee employee) {
    setState(() {
      _isUpdating = true;
    });
    _showProgress('Updating Employee...');
    Services.updateEmployee(
            employee.id, _firstNameController.text, _lastNameController.text)
        .then((result) {
      if ('success' == result) {
        _getEmployees(); // Refresh the list after update
        setState(() {
          _isUpdating = false;
        });
        _clearValues();
      }
    });
  }

  _deleteEmployee(Employee employee) {
    _showProgress('Deleting Employee...');
    Services.deleteEmployee(employee.id).then((result) {
      if ('success' == result) {
        _getEmployees(); // Refresh after delete...
      }
    });
  }

  // Method to clear TextField values
  _clearValues() {
    _firstNameController.text = '';
    _lastNameController.text = '';
  }

  _showValues(Employee employee) {
    _firstNameController.text = employee.firstName;
    _lastNameController.text = employee.lastName;
  }

  // Let's create a DataTable and show the employee list in it.
  SingleChildScrollView _dataBody() {
    // Both Vertical and Horozontal Scrollview for the DataTable to
    // scroll both Vertical and Horizontal...
    return SingleChildScrollView(
      scrollDirection: Axis.vertical,
      child: SingleChildScrollView(
        scrollDirection: Axis.horizontal,
        child: DataTable(
          columns: [
            DataColumn(
              label: Text('ID'),
            ),
            DataColumn(
              label: Text('FIRST NAME'),
            ),
            DataColumn(
              label: Text('LAST NAME'),
            ),
            // Lets add one more column to show a delete button
            DataColumn(
              label: Text('DELETE'),
            )
          ],
          rows: _employees
              .map(
                (employee) => DataRow(cells: [
                  DataCell(
                    Text(employee.id),
                    // Add tap in the row and populate the
                    // textfields with the corresponding values to update
                    onTap: () {
                      _showValues(employee);
                      // Set the Selected employee to Update
                      _selectedEmployee = employee;
                      setState(() {
                        _isUpdating = true;
                      });
                    },
                  ),
                  DataCell(
                    Text(
                      employee.firstName.toUpperCase(),
                    ),
                    onTap: () {
                      _showValues(employee);
                      // Set the Selected employee to Update
                      _selectedEmployee = employee;
                      // Set flag updating to true to indicate in Update Mode
                      setState(() {
                        _isUpdating = true;
                      });
                    },
                  ),
                  DataCell(
                    Text(
                      employee.lastName.toUpperCase(),
                    ),
                    onTap: () {
                      _showValues(employee);
                      // Set the Selected employee to Update
                      _selectedEmployee = employee;
                      setState(() {
                        _isUpdating = true;
                      });
                    },
                  ),
                  DataCell(IconButton(
                    icon: Icon(Icons.delete),
                    onPressed: () {
                      _deleteEmployee(employee);
                    },
                  ))
                ]),
              )
              .toList(),
        ),
      ),
    );
  }

  // UI
  @override
  Widget build(BuildContext context) {
    return Scaffold(
      key: _scaffoldKey,
      appBar: AppBar(
        title: Text(_titleProgress), // we show the progress in the title...
        actions: <Widget>[
          IconButton(
            icon: Icon(Icons.add),
            onPressed: () {
              _createTable();
            },
          ),
          IconButton(
            icon: Icon(Icons.refresh),
            onPressed: () {
              _getEmployees();
            },
          )
        ],
      ),
      body: Container(
        child: Column(
          mainAxisAlignment: MainAxisAlignment.center,
          children: <Widget>[
            Padding(
              padding: EdgeInsets.all(20.0),
              child: TextField(
                controller: _firstNameController,
                decoration: InputDecoration.collapsed(
                  hintText: 'First Name',
                ),
              ),
            ),
            Padding(
              padding: EdgeInsets.all(20.0),
              child: TextField(
                controller: _lastNameController,
                decoration: InputDecoration.collapsed(
                  hintText: 'Last Name',
                ),
              ),
            ),
            // Add an update button and a Cancel Button
            // show these buttons only when updating an employee
            _isUpdating
                ? Row(
                    children: <Widget>[
                      OutlineButton(
                        child: Text('UPDATE'),
                        onPressed: () {
                          _updateEmployee(_selectedEmployee);
                        },
                      ),
                      OutlineButton(
                        child: Text('CANCEL'),
                        onPressed: () {
                          setState(() {
                            _isUpdating = false;
                          });
                          _clearValues();
                        },
                      ),
                    ],
                  )
                : Container(),
            Expanded(
              child: _dataBody(),
            ),
          ],
        ),
      ),
      floatingActionButton: FloatingActionButton(
        onPressed: () {
          _addEmployee();
        },
        child: Icon(Icons.add),
      ),
    );
  }
}

Watch my youtube video to see all the above code in action.

Google’s Flutter Tutorial – Save Image as String in Local Storage and Retrieve – Preferences

$
0
0

In this tutorial we will see how to save an image as a string in preferences.


Save Image in Preferences

Save Image in Preferences


Watch Video Tutorial


Add Dependencies

First thing we have to do is to add the plugins.

Open pubspec.yaml file and add the below Dependencies.

 shared_preferences: ^0.5.0  // save the data in preferences.
 image_picker: ^0.6.0+3 // to select image from the gallery or camera.

So Let’s start…

First we will write a Utility class to save the image as a String in the Local storage.

import 'dart:typed_data';
import 'package:shared_preferences/shared_preferences.dart';
import 'package:flutter/material.dart';
import 'dart:async';
import 'dart:convert';

class Utility {
  //
  static const String KEY = "IMAGE_KEY";

  static Future<String> getImageFromPreferences() async {
    final SharedPreferences prefs = await SharedPreferences.getInstance();
    return prefs.getString(KEY) ?? null;
  }

  static Future<bool> saveImageToPreferences(String value) async {
    final SharedPreferences prefs = await SharedPreferences.getInstance();
    return prefs.setString(KEY, value);
  }

  static Image imageFromBase64String(String base64String) {
    return Image.memory(
      base64Decode(base64String),
      fit: BoxFit.fill,
    );
  }

  static Uint8List dataFromBase64String(String base64String) {
    return base64Decode(base64String);
  }

  static String base64String(Uint8List data) {
    return base64Encode(data);
  }
}

“IMAGE_KEY” is the key with which we are saving the image as String.
So this key will be used to retreive it back from the preferences.


Select Image from gallery

    imageFile = ImagePicker.pickImage(source: source);

imageFile will be a Future<file> and this will be set when the user selects an image from gallery or Camera.

Show the Selected Image in the UI

The below futureBuilder will be triggered when the user selects an image from the gallery or camera.

Widget imageFromGallery() {
    return FutureBuilder<File>(
      future: imageFile,
      builder: (BuildContext context, AsyncSnapshot<File> snapshot) {
        if (snapshot.connectionState == ConnectionState.done &&
            null != snapshot.data) {
          Utility.saveImageToPreferences(
              Utility.base64String(snapshot.data.readAsBytesSync()));
          return Image.file(
            snapshot.data,
          );
        } else if (null != snapshot.error) {
          return const Text(
            'Error Picking Image',
            textAlign: TextAlign.center,
          );
        } else {
          return const Text(
            'No Image Selected',
            textAlign: TextAlign.center,
          );
        }
      },
    );
}

Make sure to call setState on the imageFile to trigger the Future.

setState(() {
  imageFile = ImagePicker.pickImage(source: source);
});

When the file is returned, we will save the image in preferences using the below method.

 Utility.saveImageToPreferences(Utility.base64String(snapshot.data.readAsBytesSync()));

To Load it back…

 loadImageFromPreferences() {
    Utility.getImageFromPreferences().then((img) {
      if (null == img) {
        return;
      }
      setState(() {
        imageFromPreferences = Utility.imageFromBase64String(img);
      });
    });
  }

Complete Code

import 'package:flutter/material.dart';
import 'package:image_picker/image_picker.dart';
import 'dart:io';
import 'Utility.dart';

class SaveImageDemo extends StatefulWidget {
  SaveImageDemo() : super();

  final String title = "Flutter Save Image in Preferences";

  @override
  _SaveImageDemoState createState() => _SaveImageDemoState();
}

class _SaveImageDemoState extends State<SaveImageDemo> {
  //
  Future<File> imageFile;
  Image imageFromPreferences;

  pickImageFromGallery(ImageSource source) {
    setState(() {
      imageFile = ImagePicker.pickImage(source: source);
    });
  }

  loadImageFromPreferences() {
    Utility.getImageFromPreferences().then((img) {
      if (null == img) {
        return;
      }
      setState(() {
        imageFromPreferences = Utility.imageFromBase64String(img);
      });
    });
  }

  Widget imageFromGallery() {
    return FutureBuilder<File>(
      future: imageFile,
      builder: (BuildContext context, AsyncSnapshot<File> snapshot) {
        if (snapshot.connectionState == ConnectionState.done &&
            null != snapshot.data) {
          //print(snapshot.data.path);
          Utility.saveImageToPreferences(
              Utility.base64String(snapshot.data.readAsBytesSync()));
          return Image.file(
            snapshot.data,
          );
        } else if (null != snapshot.error) {
          return const Text(
            'Error Picking Image',
            textAlign: TextAlign.center,
          );
        } else {
          return const Text(
            'No Image Selected',
            textAlign: TextAlign.center,
          );
        }
      },
    );
  }

  @override
  Widget build(BuildContext context) {
    return Scaffold(
      appBar: AppBar(
        title: Text(widget.title),
        actions: <Widget>[
          IconButton(
            icon: Icon(Icons.add),
            onPressed: () {
              pickImageFromGallery(ImageSource.gallery);
              setState(() {
                imageFromPreferences = null;
              });
            },
          ),
          IconButton(
            icon: Icon(Icons.refresh),
            onPressed: () {
              loadImageFromPreferences();
            },
          ),
        ],
      ),
      body: Center(
        child: Column(
          mainAxisAlignment: MainAxisAlignment.start,
          children: <Widget>[
            SizedBox(
              height: 20.0,
            ),
            imageFromGallery(),
            SizedBox(
              height: 20.0,
            ),
            null == imageFromPreferences ? Container() : imageFromPreferences,
          ],
        ),
      ),
    );
  }
}

Google’s Flutter Tutorial – Save Image as String in SQLite Database

$
0
0

In this tutorial we will see how to save an image as a string in preferences.


Watch more flutter videos on my youtube channel here.


Save Image in SQLite

Save Image in SQLite


Watch Video Tutorial


Add Dependencies

First thing we have to do is to add the plugins.

Open pubspec.yaml file and add the below Dependencies.

 shared_preferences: ^0.5.0  // save the data in preferences.
 image_picker: ^0.6.0+3 // to select image from the gallery or camera.
 sqflite: ^1.1.3 // For Sqlite operations

So Let’s start…

First we will write a Utility class to save the image as a String and retreive it.

import 'dart:typed_data';
import 'package:shared_preferences/shared_preferences.dart';
import 'package:flutter/material.dart';
import 'dart:async';
import 'dart:convert';

class Utility {

  static Image imageFromBase64String(String base64String) {
    return Image.memory(
      base64Decode(base64String),
      fit: BoxFit.fill,
    );
  }

  static Uint8List dataFromBase64String(String base64String) {
    return base64Decode(base64String);
  }

  static String base64String(Uint8List data) {
    return base64Encode(data);
  }
}

Select Image from gallery

  pickImageFromGallery() {
    ImagePicker.pickImage(source: ImageSource.gallery).then((imgFile) {
      String imgString = Utility.base64String(imgFile.readAsBytesSync());
    });
  }

imageFile will be a Future<file> and this will be set when the user selects an image from gallery or Camera.


DBHelper

We will write a simple Utility class to save the image in the database.

Before that we need a model class to save in the database.
Create a file named “Photo.dart”

class Photo {
  int id;
  String photo_name;

  Photo(this.id, this.photo_name);

  Map<String, dynamic> toMap() {
    var map = <String, dynamic>{
      'id': id,
      'photo_name': photo_name,
    };
    return map;
  }

  Photo.fromMap(Map<String, dynamic> map) {
    id = map['id'];
    photo_name = map['photo_name'];
  }
}

Now the DBHelper class.

import 'dart:async';
import 'dart:io' as io;
import 'package:path/path.dart';
import 'package:sqflite/sqflite.dart';
import 'package:path_provider/path_provider.dart';
import 'Photo.dart';

class DBHelper {
  static Database _db;
  static const String ID = 'id';
  static const String NAME = 'photo_name';
  static const String TABLE = 'PhotosTable';
  static const String DB_NAME = 'photos.db';

  Future<Database> get db async {
    if (null != _db) {
      return _db;
    }
    _db = await initDb();
    return _db;
  }

  initDb() async {
    io.Directory documentsDirectory = await getApplicationDocumentsDirectory();
    String path = join(documentsDirectory.path, DB_NAME);
    var db = await openDatabase(path, version: 1, onCreate: _onCreate);
    return db;
  }

  _onCreate(Database db, int version) async {
    await db.execute("CREATE TABLE $TABLE ($ID INTEGER, $NAME TEXT)");
  }

  Future<Photo> save(Photo employee) async {
    var dbClient = await db;
    employee.id = await dbClient.insert(TABLE, employee.toMap());
    return employee;
  }

  Future<List<Photo>> getPhotos() async {
    var dbClient = await db;
    List<Map> maps = await dbClient.query(TABLE, columns: [ID, NAME]);
    List<Photo> employees = [];
    if (maps.length > 0) {
      for (int i = 0; i < maps.length; i++) {
        employees.add(Photo.fromMap(maps[i]));
      }
    }
    return employees;
  }

  Future close() async {
    var dbClient = await db;
    dbClient.close();
  }
}

The above class will save the image in the Photo object in the Sqlite database and getPhotos will return the list of records as list of photos.


Show the Selected Images in a GridView

gridView() {
    return Padding(
      padding: EdgeInsets.all(5.0),
      child: GridView.count(
        crossAxisCount: 2,
        childAspectRatio: 1.0,
        mainAxisSpacing: 4.0,
        crossAxisSpacing: 4.0,
        children: images.map((photo) {
          return Utility.imageFromBase64String(photo.photoName);
        }).toList(),
      ),
    );
}

To Update the images array, we will call the refreshImages() function.

refreshImages() {
  dbHelper.getPhotos().then((imgs) {
    setState(() {
      images.clear();
      images.addAll(imgs);
    });
  });
}

Complete Code

import 'package:flutter/material.dart';
import 'package:image_picker/image_picker.dart';
import 'dart:io';
import 'Utility.dart';
import 'DBHelper.dart';
import 'Photo.dart';
import 'dart:async';

class SaveImageDemoSQLite extends StatefulWidget {
  //
  SaveImageDemoSQLite() : super();

  final String title = "Flutter Save Image";

  @override
  _SaveImageDemoSQLiteState createState() => _SaveImageDemoSQLiteState();
}

class _SaveImageDemoSQLiteState extends State<SaveImageDemoSQLite> {
  //
  Future<File> imageFile;
  Image image;
  DBHelper dbHelper;
  List<Photo> images;

  @override
  void initState() {
    super.initState();
    images = [];
    dbHelper = DBHelper();
    refreshImages();
  }

  refreshImages() {
    dbHelper.getPhotos().then((imgs) {
      setState(() {
        images.clear();
        images.addAll(imgs);
      });
    });
  }

  pickImageFromGallery() {
    ImagePicker.pickImage(source: ImageSource.gallery).then((imgFile) {
      String imgString = Utility.base64String(imgFile.readAsBytesSync());
      Photo photo = Photo(0, imgString);
      dbHelper.save(photo);
      refreshImages();
    });
  }

  gridView() {
    return Padding(
      padding: EdgeInsets.all(5.0),
      child: GridView.count(
        crossAxisCount: 2,
        childAspectRatio: 1.0,
        mainAxisSpacing: 4.0,
        crossAxisSpacing: 4.0,
        children: images.map((photo) {
          return Utility.imageFromBase64String(photo.photoName);
        }).toList(),
      ),
    );
  }

  @override
  Widget build(BuildContext context) {
    return Scaffold(
      appBar: AppBar(
        title: Text(widget.title),
        actions: <Widget>[
          IconButton(
            icon: Icon(Icons.add),
            onPressed: () {
              pickImageFromGallery();
            },
          )
        ],
      ),
      body: Center(
        child: Column(
          mainAxisAlignment: MainAxisAlignment.start,
          children: <Widget>[
            Flexible(
              child: gridView(),
            )
          ],
        ),
      ),
    );
  }
}

Thanks for reading…
Please watch the video tutorial to see it in action.

Bar Charts in Flutter

$
0
0

Hi,

In this article, we will see how to draw bar charts in flutter.

Bar Charts in Flutter

Bar Charts in Flutter


Watch Video Tutorial


To draw charts in flutter, we need to add a dependency. So open your pubspec.yaml file and add the below dependency below dependencies.

Dependencies

dependencies:
  flutter: 
    sdk: flutter

  # The following adds the Cupertino Icons font to your application.
  # Use with the CupertinoIcons class for iOS style icons.
  cupertino_icons: ^0.1.2
  ... 
  charts_flutter: ^0.8.1

After that run ‘flutter packages get’ to add the package.

Once the plugin is installed, import it in the file you want to use it.

  import 'package:charts_flutter/flutter.dart' as charts;

Let’s create some sample data for the charts first

First we will create a class that holds our chart data. The class here is called ‘Sales’

class Sales {
  final String year;
  final int sales;

  Sales(this.year, this.sales);
}

Now we will create a list to hold a series of Chart data.
_createRandomData creates some random Sales Data.


 List<charts.Series> seriesList;

 static List<charts.Series<Sales, String>> _createRandomData() {
    final random = Random();

    final desktopSalesData = [
      Sales('2015', random.nextInt(100)),
      Sales('2016', random.nextInt(100)),
      Sales('2017', random.nextInt(100)),
      Sales('2018', random.nextInt(100)),
      Sales('2019', random.nextInt(100)),
    ];

    return [
      charts.Series<Sales, String>(
        id: 'Sales',
        domainFn: (Sales sales, _) => sales.year,
        measureFn: (Sales sales, _) => sales.sales,
        data: desktopSalesData,
        fillColorFn: (Sales sales, _) {
          return charts.MaterialPalette.blue.shadeDefault;
        },
      )
    ];

  }

Add the Chart

First we will initialize the series list, then we will pass it to the BarChart constructor.


  @override
  void initState() {
    super.initState();
    seriesList = _createRandomData();
  }

  barChart() {
    return charts.BarChart(
      seriesList,
      animate: true,
      vertical: false,
    );
  }

Ok. It’s done. it’s that simple.


if you want to add a stacked or grouped bar chart, just add more series like this.

static List<charts.Series<Sales, String>> _createRandomData() {
    final random = Random();

    final desktopSalesData = [
      Sales('2015', random.nextInt(100)),
      Sales('2016', random.nextInt(100)),
      Sales('2017', random.nextInt(100)),
      Sales('2018', random.nextInt(100)),
      Sales('2019', random.nextInt(100)),
    ];

    final tabletSalesData = [
      Sales('2015', random.nextInt(100)),
      Sales('2016', random.nextInt(100)),
      Sales('2017', random.nextInt(100)),
      Sales('2018', random.nextInt(100)),
      Sales('2019', random.nextInt(100)),
    ];

    final mobileSalesData = [
      Sales('2015', random.nextInt(100)),
      Sales('2016', random.nextInt(100)),
      Sales('2017', random.nextInt(100)),
      Sales('2018', random.nextInt(100)),
      Sales('2019', random.nextInt(100)),
    ];

    return [
      charts.Series<Sales, String>(
        id: 'Sales',
        domainFn: (Sales sales, _) => sales.year,
        measureFn: (Sales sales, _) => sales.sales,
        data: desktopSalesData,
        fillColorFn: (Sales sales, _) {
          return charts.MaterialPalette.blue.shadeDefault;
        },
      ),
      charts.Series<Sales, String>(
        id: 'Sales',
        domainFn: (Sales sales, _) => sales.year,
        measureFn: (Sales sales, _) => sales.sales,
        data: tabletSalesData,
        fillColorFn: (Sales sales, _) {
          return charts.MaterialPalette.green.shadeDefault;
        },
      ),
      charts.Series<Sales, String>(
        id: 'Sales',
        domainFn: (Sales sales, _) => sales.year,
        measureFn: (Sales sales, _) => sales.sales,
        data: mobileSalesData,
        fillColorFn: (Sales sales, _) {
          return charts.MaterialPalette.teal.shadeDefault;
        },
      )
    ];
  }

  barChart() {
    return charts.BarChart(
      seriesList,
      animate: true,
      vertical: false,
      barGroupingType: charts.BarGroupingType.grouped,
      defaultRenderer: charts.BarRendererConfig(
        groupingType: charts.BarGroupingType.grouped,
        strokeWidthPx: 1.0,
      ),
      // domainAxis: charts.OrdinalAxisSpec(
      //   renderSpec: charts.NoneRenderSpec(),
       ),
    );
  }
Flutter Charts

Flutter Charts


Complete Code

import 'package:flutter/material.dart';
import 'dart:math';
import 'package:charts_flutter/flutter.dart' as charts;

class ChartsDemo extends StatefulWidget {
  //
  ChartsDemo() : super();

  final String title = "Charts Demo";

  @override
  ChartsDemoState createState() => ChartsDemoState();
}

class ChartsDemoState extends State<ChartsDemo> {
  //
  List<charts.Series> seriesList;

  static List<charts.Series<Sales, String>> _createRandomData() {
    final random = Random();

    final desktopSalesData = [
      Sales('2015', random.nextInt(100)),
      Sales('2016', random.nextInt(100)),
      Sales('2017', random.nextInt(100)),
      Sales('2018', random.nextInt(100)),
      Sales('2019', random.nextInt(100)),
    ];

    final tabletSalesData = [
      Sales('2015', random.nextInt(100)),
      Sales('2016', random.nextInt(100)),
      Sales('2017', random.nextInt(100)),
      Sales('2018', random.nextInt(100)),
      Sales('2019', random.nextInt(100)),
    ];

    final mobileSalesData = [
      Sales('2015', random.nextInt(100)),
      Sales('2016', random.nextInt(100)),
      Sales('2017', random.nextInt(100)),
      Sales('2018', random.nextInt(100)),
      Sales('2019', random.nextInt(100)),
    ];

    return [
      charts.Series<Sales, String>(
        id: 'Sales',
        domainFn: (Sales sales, _) => sales.year,
        measureFn: (Sales sales, _) => sales.sales,
        data: desktopSalesData,
        fillColorFn: (Sales sales, _) {
          return charts.MaterialPalette.blue.shadeDefault;
        },
      ),
      charts.Series<Sales, String>(
        id: 'Sales',
        domainFn: (Sales sales, _) => sales.year,
        measureFn: (Sales sales, _) => sales.sales,
        data: tabletSalesData,
        fillColorFn: (Sales sales, _) {
          return charts.MaterialPalette.green.shadeDefault;
        },
      ),
      charts.Series<Sales, String>(
        id: 'Sales',
        domainFn: (Sales sales, _) => sales.year,
        measureFn: (Sales sales, _) => sales.sales,
        data: mobileSalesData,
        fillColorFn: (Sales sales, _) {
          return charts.MaterialPalette.teal.shadeDefault;
        },
      )
    ];
  }

  barChart() {
    return charts.BarChart(
      seriesList,
      animate: true,
      vertical: false,
      barGroupingType: charts.BarGroupingType.grouped,
      defaultRenderer: charts.BarRendererConfig(
        groupingType: charts.BarGroupingType.grouped,
        strokeWidthPx: 1.0,
      ),
      domainAxis: charts.OrdinalAxisSpec(
        renderSpec: charts.NoneRenderSpec(),
      ),
    );
  }

  @override
  void initState() {
    super.initState();
    seriesList = _createRandomData();
  }

  @override
  Widget build(BuildContext context) {
    return Scaffold(
      appBar: AppBar(
        title: Text(widget.title),
      ),
      body: Container(
        padding: EdgeInsets.all(20.0),
        child: barChart(),
      ),
    );
  }
}

class Sales {
  final String year;
  final int sales;

  Sales(this.year, this.sales);
}

Share Data outside the application in Flutter.

$
0
0

This article will show you how to share data from our application to another, just like when you hit share on an image inside your gallery. The system will ask you to select an application to share to.

Share Data Flutter

Share Data Flutter


Watch Video Tutorial


So we are going to achieve this in Flutter with the help of a plugin.
We need to add the plugin to the pubspec.yaml file first.

Add Dependencies

Add this entry below the Dependencies in pubspec.yaml file

 dependencies:

    ...
    share: ^0.6.3+1
    ...

Now to Invoke the share action with some data we have to call like this…

 final RenderBox box = context.findRenderObject();
    Share.share(text,
        subject: subject,
        sharePositionOrigin: box.localToGlobal(Offset.zero) & box.size);

Wraps the platform’s native share dialog. Can share a text and/or a URL.
It uses the `ACTION_SEND` Intent on Android and `UIActivityViewController`
on iOS.

The optional [subject] parameter can be used to populate a subject if the
user chooses to send an email.

The optional [sharePositionOrigin] parameter can be used to specify a global
origin rect for the share sheet to popover from on iPads. It has no effect
on non-iPads.


Complete Example

A Complete example will look like this

import 'package:flutter/material.dart';
import 'package:share/share.dart';

class ShareDemo extends StatefulWidget {
  @override
  ShareDemoState createState() => ShareDemoState();
}

class ShareDemoState extends State<ShareDemo> {
  //
  String text = '';
  String subject = '';

  share(BuildContext context) {
    final RenderBox box = context.findRenderObject();
    Share.share(text,
        subject: subject,
        sharePositionOrigin: box.localToGlobal(Offset.zero) & box.size);
  }

  @override
  Widget build(BuildContext context) {
    return MaterialApp(
      title: 'Share Demo',
      home: Scaffold(
        appBar: AppBar(
          title: const Text('Share Demo'),
        ),
        body: Container(
          padding: EdgeInsets.all(25.0),
          child: Column(
            mainAxisAlignment: MainAxisAlignment.center,
            children: <Widget>[
              TextField(
                decoration: const InputDecoration(
                  labelText: 'Text',
                  hintText: 'Enter some text or link to share',
                ),
                maxLines: 2,
                onChanged: (String txt) {
                  setState(() {
                    text = txt;
                  });
                },
              ),
              TextField(
                decoration: const InputDecoration(
                  labelText: 'Text',
                  hintText: 'Enter some subject to share',
                ),
                maxLines: 2,
                onChanged: (String txt) {
                  setState(() {
                    subject = txt;
                  });
                },
              ),
              SizedBox(
                height: 20,
              ),
              Builder(
                builder: (BuildContext context) {
                  return RaisedButton(
                    child: const Text('Share'),
                    onPressed: text.isEmpty
                        ? null
                        : () {
                            share(context);
                          },
                  );
                },
              ),
            ],
          ),
        ),
      ),
    );
  }
}

That’s it.


Open Urls in Browser, In App, Make Phone Calls, Open Installed Apps in Flutter

$
0
0

Launch Urls in Flutter

Launch Urls in Flutter


This demo will show how can we

  • Launch urls in a browser outside the App
  • Launch urls in a browser inside the App
  • Launch Installed app (eg:youtube)
  • Make Phone Call.

Launch Urls in Flutter

Launch Urls in Flutter


Watch Video Tutorial


Add Dependencies

To make all this work, we need the url launcher plugin.

Open the pubspec.yaml file in your project and add this plugin at the end of Dependencies.

  dependencies:
    flutter: 
      sdk: flutter

    # The following adds the Cupertino Icons font to your application.
    # Use with the CupertinoIcons class for iOS style icons.
    ...
    url_launcher: ^5.2.5 

Then run ‘flutter packages get’ to download and integrate the library into your app.


Launch url in browser

Future<void> _launchInBrowser(String url) async {
    if (await canLaunch(url)) {
      await launch(
        url,
        forceSafariVC: false,
        forceWebView: false,
        headers: <String, String>{'header_key': 'header_value'},
      );
    } else {
      throw 'Could not launch $url';
    }
}

In the above code, first we are going to check if the Url is Launchable, if yes then we call launch to launch the url in a browser. Whether to load url inside or outside the app is determined by the forceSafariVC property.
if you set forceSafariVC to true, then it will be launched inside the app otherwise it will be loaded in a browser outside the app.


Launch Universal links

The best example here is the youtube App. When you try to launch a youtube url, the app will launch it for you, correct.
We are going to achieve similar functionality here.

The below code helps you to achieve this.


  Future<void> _launchUniversalLinkIos(String url) async {
    if (await canLaunch(url)) {
      final bool nativeAppLaunchSucceeded = await launch(
        url,
        forceSafariVC: false,
        universalLinksOnly: true,
      );
      if (!nativeAppLaunchSucceeded) {
        await launch(url, forceSafariVC: true);
      }
    }
  }

Make Phone Call

The phone dialer is another app which you can open with the help of this library.

 Future<void> _makePhoneCall(String url) async {
    if (await canLaunch(url)) {
      await launch(url);
    } else {
      throw 'Could not launch $url';
    }
  }

  // Call the above function in the proper phone number format
  // To Launch the phone dialer, you need to append tel: before the phone number.
   _makePhoneCall('tel:1234567890');

To close the launched webview inside the app, you can simply call closeWebView().

To see all the above code in action, please watch the Youtube tutorial.

Please leave your valuable comments below.


Custom BottomSheet, Custom Snackbar in Flutter using FlushBox

$
0
0

In this article we will see how to use a nice plugin called FlushBox in Flutter.

First thing to do is to add dependencies.

Add Dependencies

Go to your pubspec.yaml file and add the below dependency.

dependencies:
    flutter:
        sdk: flutter

    ...
    flushbar: ^1.9.1

Once done that run ‘flutter packages get’ in the terminal to download the packages to be used by your project.

Simple Snackbar

At first we will how to create a simple Snackbar.
Here is a simple example.

 Flushbar(
      title: 'Hello there',
      message: 'How are you?',
      duration: Duration(seconds: 3),
      flushbarPosition: FlushbarPosition.BOTTOM,
      flushbarStyle: FlushbarStyle.GROUNDED,
    )..show(context);

If you want to listen to the widget updates like showing, hiding etc, then you can add the onStatusChanged property.

  onStatusChanged: (FlushbarStatus status) {
        switch (status) {
          case FlushbarStatus.SHOWING:
            {
              print('SHOWING');
              break;
            }
          case FlushbarStatus.IS_APPEARING:
            {
              print('IS_APPEARING');
              break;
            }
          case FlushbarStatus.IS_HIDING:
            {
              print('IS_HIDING');
              break;
            }
          case FlushbarStatus.DISMISSED:
            {
              print('DISMISSED');
              break;
            }
        }
      },


Custom BottomSheet

Let’s create a custom BottomSheet.


Flushbar flushbar;

flushbar = Flushbar(
      title: 'Hello there',
      message: 'How are you?',
      duration: Duration(seconds: 30),
      flushbarPosition: FlushbarPosition.BOTTOM,
      flushbarStyle: FlushbarStyle.GROUNDED,
      reverseAnimationCurve: Curves.decelerate,
      forwardAnimationCurve: Curves.elasticInOut,
      backgroundColor: Colors.red,
      boxShadows: [
        BoxShadow(
          color: Colors.blue[800],
          offset: Offset(0.0, 2.0),
          blurRadius: 3.0,
        ),
      ],
      backgroundGradient: LinearGradient(
        colors: [Colors.blueGrey, Colors.green],
      ),
      isDismissible: false,
      icon: Icon(
        Icons.check,
        color: Colors.yellow,
      ),
      mainButton: FlatButton(
        onPressed: () {
          flushbar.dismiss();
        },
        child: Text(
          'DONE',
          style: TextStyle(color: Colors.white),
        ),
      ),
      showProgressIndicator: true,
      progressIndicatorBackgroundColor: Colors.blueGrey,
    )..show(context);
  

All the properties are self explanatory.
You can see the results in the below screenshot.


Add Input Controls

For this we need the below variables because we are going to add a TextFormField in the BottomSheet.

  TextEditingController _controller = TextEditingController();
  Flushbar<List<String>> flushbar2;
  final GlobalKey<FormState> _formKey = GlobalKey<FormState>();
  Form userInputForm;
  String inputVal = '';

Now we will write a function to return a TextFormField.
Here the FlushBar is Flushbar> because we are expecting a String List after the FlushBar is dismissed.
When the FlushBar is dismissed using flushbar2.dismiss, we will send a list array along with it. This is shown in the below example.

TextFormField getFormField() {
    return TextFormField(
      controller: _controller,
      initialValue: null,
      style: TextStyle(color: Colors.white),
      maxLength: 100,
      maxLines: 1,
      decoration: InputDecoration(
        fillColor: Colors.white12,
        filled: true,
        icon: Icon(
          Icons.label,
          color: Colors.green,
        ),
        border: UnderlineInputBorder(),
        helperText: 'Enter Name',
        helperStyle: TextStyle(color: Colors.grey),
        labelText: 'Type your name',
        labelStyle: TextStyle(color: Colors.grey),
      ),
    );
  }


Full Source code

import 'package:flutter/material.dart';
import 'package:flushbar/flushbar.dart';

class FlushBarDemo extends StatefulWidget {
  //
  final String title = "FlushBar Demo";
  @override
  FlushBarDemoState createState() => FlushBarDemoState();
}

class FlushBarDemoState extends State<FlushBarDemo> {
  //

  Flushbar flushbar;

  //
  TextEditingController _controller = TextEditingController();
  Flushbar<List<String>> flushbar2;
  final GlobalKey<FormState> _formKey = GlobalKey<FormState>();
  Form userInputForm;
  String inputVal = '';

  TextFormField getFormField() {
    return TextFormField(
      controller: _controller,
      initialValue: null,
      style: TextStyle(color: Colors.white),
      maxLength: 100,
      maxLines: 1,
      decoration: InputDecoration(
        fillColor: Colors.white12,
        filled: true,
        icon: Icon(
          Icons.label,
          color: Colors.green,
        ),
        border: UnderlineInputBorder(),
        helperText: 'Enter Name',
        helperStyle: TextStyle(color: Colors.grey),
        labelText: 'Type your name',
        labelStyle: TextStyle(color: Colors.grey),
      ),
    );
  }

  withInputField(BuildContext context) async {
    flushbar2 = Flushbar<List<String>>(
      flushbarPosition: FlushbarPosition.BOTTOM,
      flushbarStyle: FlushbarStyle.GROUNDED,
      reverseAnimationCurve: Curves.decelerate,
      forwardAnimationCurve: Curves.elasticIn,
      userInputForm: Form(
        key: _formKey,
        child: Column(
          mainAxisSize: MainAxisSize.min,
          crossAxisAlignment: CrossAxisAlignment.center,
          children: <Widget>[
            getFormField(),
            Align(
              alignment: Alignment.bottomRight,
              child: Padding(
                padding: EdgeInsets.all(20.0),
                child: FlatButton(
                  child: Text('DONE'),
                  shape: RoundedRectangleBorder(
                    borderRadius: BorderRadius.circular(15.0),
                  ),
                  color: Colors.white,
                  textColor: Colors.red,
                  padding: EdgeInsets.all(6.0),
                  onPressed: () {
                    flushbar2.dismiss([_controller.text, ' World']);
                  },
                ),
              ),
            ),
          ],
        ),
      ),
    )..show(context).then((result) {
        if (null != result) {
          String userInput1 = result[0];
          String userInput2 = result[1];
          setState(() {
            inputVal = userInput1 + userInput2;
          });
        }
      });
  }

  custom(BuildContext context) {
    flushbar = Flushbar(
      title: 'Hello there',
      message: 'How are you?',
      duration: Duration(seconds: 30),
      flushbarPosition: FlushbarPosition.BOTTOM,
      flushbarStyle: FlushbarStyle.GROUNDED,
      reverseAnimationCurve: Curves.decelerate,
      forwardAnimationCurve: Curves.elasticInOut,
      backgroundColor: Colors.red,
      boxShadows: [
        BoxShadow(
          color: Colors.blue[800],
          offset: Offset(0.0, 2.0),
          blurRadius: 3.0,
        ),
      ],
      backgroundGradient: LinearGradient(
        colors: [Colors.blueGrey, Colors.green],
      ),
      isDismissible: false,
      icon: Icon(
        Icons.check,
        color: Colors.yellow,
      ),
      mainButton: FlatButton(
        onPressed: () {
          flushbar.dismiss();
        },
        child: Text(
          'DONE',
          style: TextStyle(color: Colors.white),
        ),
      ),
      showProgressIndicator: true,
      progressIndicatorBackgroundColor: Colors.blueGrey,
    )..show(context);
  }

  normal(BuildContext context) {
    Flushbar(
      title: 'Hello there',
      message: 'How are you?',
      duration: Duration(seconds: 3),
      flushbarPosition: FlushbarPosition.BOTTOM,
      flushbarStyle: FlushbarStyle.GROUNDED,
      onStatusChanged: (FlushbarStatus status) {
        switch (status) {
          case FlushbarStatus.SHOWING:
            {
              print('SHOWING');
              break;
            }
          case FlushbarStatus.IS_APPEARING:
            {
              print('IS_APPEARING');
              break;
            }
          case FlushbarStatus.IS_HIDING:
            {
              print('IS_HIDING');
              break;
            }
          case FlushbarStatus.DISMISSED:
            {
              print('DISMISSED');
              break;
            }
        }
      },
    )..show(context);
  }

  @override
  Widget build(BuildContext context) {
    return Scaffold(
      appBar: AppBar(
        title: Text('FlushBar Demo'),
      ),
      body: Container(
        padding: EdgeInsets.all(20.0),
        child: Column(
          mainAxisAlignment: MainAxisAlignment.start,
          crossAxisAlignment: CrossAxisAlignment.stretch,
          children: <Widget>[
            OutlineButton(
              child: Text('Show FlushBar'),
              onPressed: () {
                normal(context);
              },
            ),
            OutlineButton(
              child: Text('Show Custom FlushBar'),
              onPressed: () {
                custom(context);
              },
            ),
            OutlineButton(
              child: Text('Show Custom FlushBar With Input Field'),
              onPressed: () {
                withInputField(context);
              },
            ),
            SizedBox(
              height: 20.0,
            ),
            Text(inputVal),
          ],
        ),
      ),
    );
  }
}

Parsing RSS Feeds in Flutter

$
0
0

RSS Feed Parsing In Flutter

RSS Feed Parsing In Flutter


Add Dependencies

The first thing is to add the plugins in the pubspec.yaml file.

We need 4 plugins for this demo.

  1. http package – to get the Feed
  2. webfeed – to parse the RSS/Atom Feed
  3. cached_network_image – to cache the images
  4. url_launcher – to open the feed url in a browser

Your pubspec.yaml file should look like this

dependencies:
    flutter:
        sdk: flutter
    ...

    http: '0.11.3+17'
    webfeed: ^0.4.2
    cached_network_image: ^1.0.0
    url_launcher: ^5.2.5

Get the Feed

 static const String FEED_URL =
      'https://www.nasa.gov/rss/dyn/lg_image_of_the_day.rss';
  RssFeed _feed;

  Future<RssFeed> loadFeed() async {
    try {
      final client = http.Client();
      final response = await client.get(FEED_URL);
      return RssFeed.parse(response.body);
    } catch (e) {
      //
    }
    return null;
  }

  load() async {
    loadFeed().then((result) {
      if (null == result || result.toString().isEmpty) {
        updateTitle(feedLoadErrorMsg);
        return;
      }
      updateFeed(result);
    });
  }

  updateFeed(feed) {
    setState(() {
      _feed = feed;
    });
  }

The above function will download the feed and parse it.

Now we have the parsed feeds, next is just create a listview and show the data in it.
The whole set of below funtions create the title, subtitle, left thumbnail icon and right arrow icon for each list row.
Then finally the list() function creates the list and show the feed.

title(title) {
    return Text(
      title,
      style: TextStyle(fontSize: 18.0, fontWeight: FontWeight.w500),
      maxLines: 2,
      overflow: TextOverflow.ellipsis,
    );
  }

  subtitle(subTitle) {
    return Text(
      subTitle,
      style: TextStyle(fontSize: 14.0, fontWeight: FontWeight.w100),
      maxLines: 1,
      overflow: TextOverflow.ellipsis,
    );
  }

  thumbnail(imageUrl) {
    return Padding(
      padding: EdgeInsets.only(left: 15.0),
      child: CachedNetworkImage(
        placeholder: (context, url) => Image.asset(placeholderImg),
        imageUrl: imageUrl,
        height: 50,
        width: 70,
        alignment: Alignment.center,
        fit: BoxFit.fill,
      ),
    );
  }

  rightIcon() {
    return Icon(
      Icons.keyboard_arrow_right,
      color: Colors.grey,
      size: 30.0,
    );
  }

  list() {
    return ListView.builder(
      itemCount: _feed.items.length,
      itemBuilder: (BuildContext context, int index) {
        final item = _feed.items[index];
        return ListTile(
          title: title(item.title),
          subtitle: subtitle(item.pubDate),
          leading: thumbnail(item.enclosure.url),
          trailing: rightIcon(),
          contentPadding: EdgeInsets.all(5.0),
          onTap: () => openFeed(item.link), // code below
        );
      },
    );
  }

  isFeedEmpty() {
    return null == _feed || null == _feed.items;
  }

  body() {
    return isFeedEmpty()
        ? Center(
            child: CircularProgressIndicator(),
          )
        : RefreshIndicator(
            key: _refreshKey,
            child: list(),
            onRefresh: () => load(),
          );
  }

Open Feed in browser

The Url launcher package will help us here.
The openFeed function will open the url inside a browser. The forceSafariVC property set to true will open the browser inside the app.


  Future<void> openFeed(String url) async {
    if (await canLaunch(url)) {
      await launch(
        url,
        forceSafariVC: true,
        forceWebView: false,
      );
      return;
    }
  }

That’s it for this simple example.


RSS Feed Parsing in  Flutter

RSS Feed Parsing in Flutter


Source code

Here is the full source code.

import 'package:flutter/material.dart';
import 'package:webfeed/webfeed.dart';
import 'package:http/http.dart' as http;
import 'package:url_launcher/url_launcher.dart';
import 'package:cached_network_image/cached_network_image.dart';

class RSSDemo extends StatefulWidget {
  //
  RSSDemo() : super();

  final String title = 'RSS Feed Demo';

  @override
  RSSDemoState createState() => RSSDemoState();
}

class RSSDemoState extends State<RSSDemo> {
  //
  static const String FEED_URL =
      'https://www.nasa.gov/rss/dyn/lg_image_of_the_day.rss';
  RssFeed _feed;
  String _title;
  static const String loadingFeedMsg = 'Loading Feed...';
  static const String feedLoadErrorMsg = 'Error Loading Feed.';
  static const String feedOpenErrorMsg = 'Error Opening Feed.';
  static const String placeholderImg = 'images/no_image.png';
  GlobalKey<RefreshIndicatorState> _refreshKey;

  updateTitle(title) {
    setState(() {
      _title = title;
    });
  }

  updateFeed(feed) {
    setState(() {
      _feed = feed;
    });
  }

  Future<void> openFeed(String url) async {
    if (await canLaunch(url)) {
      await launch(
        url,
        forceSafariVC: true,
        forceWebView: false,
      );
      return;
    }
    updateTitle(feedOpenErrorMsg);
  }

  load() async {
    updateTitle(loadingFeedMsg);
    loadFeed().then((result) {
      if (null == result || result.toString().isEmpty) {
        updateTitle(feedLoadErrorMsg);
        return;
      }
      updateFeed(result);
      updateTitle(_feed.title);
    });
  }

  Future<RssFeed> loadFeed() async {
    try {
      final client = http.Client();
      final response = await client.get(FEED_URL);
      return RssFeed.parse(response.body);
    } catch (e) {
      //
    }
    return null;
  }

  @override
  void initState() {
    super.initState();
    _refreshKey = GlobalKey<RefreshIndicatorState>();
    updateTitle(widget.title);
    load();
  }

  title(title) {
    return Text(
      title,
      style: TextStyle(fontSize: 18.0, fontWeight: FontWeight.w500),
      maxLines: 2,
      overflow: TextOverflow.ellipsis,
    );
  }

  subtitle(subTitle) {
    return Text(
      subTitle,
      style: TextStyle(fontSize: 14.0, fontWeight: FontWeight.w100),
      maxLines: 1,
      overflow: TextOverflow.ellipsis,
    );
  }

  thumbnail(imageUrl) {
    return Padding(
      padding: EdgeInsets.only(left: 15.0),
      child: CachedNetworkImage(
        placeholder: (context, url) => Image.asset(placeholderImg),
        imageUrl: imageUrl,
        height: 50,
        width: 70,
        alignment: Alignment.center,
        fit: BoxFit.fill,
      ),
    );
  }

  rightIcon() {
    return Icon(
      Icons.keyboard_arrow_right,
      color: Colors.grey,
      size: 30.0,
    );
  }

  list() {
    return ListView.builder(
      itemCount: _feed.items.length,
      itemBuilder: (BuildContext context, int index) {
        final item = _feed.items[index];
        return ListTile(
          title: title(item.title),
          subtitle: subtitle(item.pubDate),
          leading: thumbnail(item.enclosure.url),
          trailing: rightIcon(),
          contentPadding: EdgeInsets.all(5.0),
          onTap: () => openFeed(item.link),
        );
      },
    );
  }

  isFeedEmpty() {
    return null == _feed || null == _feed.items;
  }

  body() {
    return isFeedEmpty()
        ? Center(
            child: CircularProgressIndicator(),
          )
        : RefreshIndicator(
            key: _refreshKey,
            child: list(),
            onRefresh: () => load(),
          );
  }

  @override
  Widget build(BuildContext context) {
    return Scaffold(
      appBar: AppBar(
        title: Text(_title),
      ),
      body: body(),
    );
  }
}

Watch the complete youtube tutorial to see parsing RSS Feed in Flutter in action.
Please like, Subsribe and Share if you find my video useful.

Thanks for reading the article.

Please leave your valuable comments below.

Different ways to Navigate and Different ways to send parameters for Navigation in Flutter

$
0
0

Watch Video Tutorial


Navigate using Push

Normally if we want to navigate from one screen to another we would use Navigate.push, like in the code below

Navigator.push(
  context,
  MaterialPageRoute(
    builder: (context) => SecondScreen()
  ),
);

And if we want to send parameters, then one of the way to do this is like below

Navigator.push(
  context,
  MaterialPageRoute(
    builder: (context) => SecondScreen(
      'param1',
      'param2',
    ),
  ),
);

Here SecondScreen is another screen that extends StatelessWidget or StatefulWidget which as a constructor like this.


  final String title;
  final String message;

  SecondScreen({this.title, this.message});

Now we see another way to send parameters to next screen where we will use the ‘settings’ property inside the ‘MaterialPageRoute‘. So the above piece of code will change like this.

Navigator.push(
  context,
  MaterialPageRoute(
    builder: (context) => SecondScreen(),
    settings: RouteSettings(
      arguments: ScreenArguments(
        _controllerTitle.text,
        _controllerMessage.text,
      ),
    ),
  ),
);

Here ScreenArguments is our own custom class which is used to send two parameters while navigating to SecondScreen.

ScreenArguments class will look like this

class ScreenArguments {
  final String title;
  final String message;

  ScreenArguments(this.title, this.message);
}

So you can have your own custom object there. Now how will we receive it in the SecondScreen. For that we use the code like below in the build method of SecondScreen.

final ScreenArguments args = ModalRoute.of(context).settings.arguments;

Here args.title will get us the title parameter and args.message will get us the message parameter.


Navigate Using PushNamed

In this method, you need to register the screens up-front.
So we go to the main.dart and update our main Widget code like this.

class HomeApp extends StatelessWidget {
  @override
  Widget build(BuildContext context) {
    return MaterialApp(
      debugShowCheckedModeBanner: false,
      //home: FirstScreen(),
      routes: {
        FirstScreen.routeId: (context) => FirstScreen(),
        SecondScreen.routeId: (context) => SecondScreen(),
      },
      initialRoute: FirstScreen.routeId,
    );
  }
}

Here FirstScreen.routeId is a static String declared in the FirstScreen Screen. It can be any meaningful value. Similarly for SecondScreen.

// FirstScreen
static String routeId = 'first_screen';
// SecondScreen
static String routeId = 'second_screen';

Once done we can navigate using the below method.

Navigator.pushNamed(
  context,
  SecondScreen.routeId,
  arguments: ScreenArguments(
    _controllerTitle.text,
    _controllerMessage.text,
  ),
);

Listen to return values from Closing Screen

For Listening to the returning values from a Closing Screen, we need to pass parameters back in the pop method of the Navigator like this.

Navigator.pop(context, 'YOUR_VALUE_HERE');

Now to receive it. Call await on the Navigator.push or Navigator.pushNamed like below

 final result = await Navigator.pushNamed(
  context,
  SecondScreen.routeId,
  arguments: ScreenArguments(
    _controllerTitle.text,
    _controllerMessage.text,
  ),
);

and we will have the return value in the ‘result‘ variable here, and That’s it.

Don’t forget to watch this tutorial on Youtube.
Also Please Like, share, subscribe if you find the article and video useful.


Proper way to Handle Exceptions in Flutter

$
0
0

Today we will see how we can properly handle errors and exceptions in Flutter.

Watch Video Tutorial


For this example we will be doing a service call and handle exceptions related to that.

We will create a sample service here


 static const String url = 'https://jsonplaceholder.typicode.com/users';

 static Future<List<User>> getUsers() async {
    try {
      final response = await http.get(url);
      if (200 == response.statusCode) {
        List<User> users = parseUsers(response.body);
        return users;
      } else {
        return List<User>();
      }
    } catch (e) {
      throw Exception(e.message);
    }
  }

  static List<User> parseUsers(String responseBody) {
    final parsed = json.decode(responseBody).cast<Map<String, dynamic>>();
    return parsed.map<User>((json) => User.fromJson(json)).toList();
  }

// User.dart
class User {
  int id;
  String name;
  String email;

  User({this.id, this.name, this.email});

  factory User.fromJson(Map<String, dynamic> json) {
    return User(
      id: json['id'] as int,
      name: json['name'] as String,
      email: json['email'] as String,
    );
  }
}

In the above example we are catching all exceptions using a simple try catch block which is not suitable since there can be a variety of Exceptions in this scenario like a SocketException, HttpException or a FormatException.

So in that case how do we catch those exceptions separately and provide appropriate messages to the user.


Now the beauty of dart is you can throw any custom object as Exception. So lets create some custom classes to throw for each exception above.

class NoInternetException {
  String message;
  NoInternetException(this.message);
}

class NoServiceFoundException {
  String message;
  NoServiceFoundException(this.message);
}

class InvalidFormatException {
  String message;
  InvalidFormatException(this.message);
}

class UnknownException {
  String message;
  UnknownException(this.message);
}

Now we will modify our function to get the users above like below

import 'dart:io';

import 'package:http/http.dart' as http;
import 'dart:convert';
import 'User.dart';
import 'Exceptions.dart';

class Services {
  static const String url = 'https://jsonplaceholder.typicode.com/users';

  static Future<List<User>> getUsers() async {
    try {
      final response = await http.get(url);
      if (200 == response.statusCode) {
        List<User> users = parseUsers(response.body);
        return users;
        //throw Exception('Unknown Error');
      } else {
        return List<User>();
      }
    } on SocketException catch (e) {
      throw NoInternetException('No Internet');
    } on HttpException {
      throw NoServiceFoundException('No Service Found');
    } on FormatException {
      throw InvalidFormatException('Invalid Data Format');
    } catch (e) {
      throw UnknownException(e.message);
    }
  }

  static List<User> parseUsers(String responseBody) {
    final parsed = json.decode(responseBody).cast<Map<String, dynamic>>();
    return parsed.map<User>((json) => User.fromJson(json)).toList();
  }
}

In the UI, we will catch the exception like this

 list() {
    return FutureBuilder(
      future: users,
      builder: (context, snapshot) {
        if (snapshot.hasData) {
          List<User> users = snapshot.data;
          if (users.isEmpty) {
            return showError('No Users');
          }
          return Column(
            crossAxisAlignment: CrossAxisAlignment.start,
            children: users
                .map(
                  (user) => Padding(
                    padding: EdgeInsets.all(10.0),
                    child: Text(
                      user.name,
                      style: TextStyle(
                        fontSize: 20.0,
                      ),
                    ),
                  ),
                )
                .toList(),
          );
        }
        if (snapshot.hasError) {
          if (snapshot.error is NoInternetException) {
            NoInternetException noInternetException =
                snapshot.error as NoInternetException;
            return showError(noInternetException.message);
          }
          if (snapshot.error is NoServiceFoundException) {
            NoServiceFoundException noServiceFoundException =
                snapshot.error as NoServiceFoundException;
            return showError(noServiceFoundException.message);
          }
          if (snapshot.error is InvalidFormatException) {
            InvalidFormatException invalidFormatException =
                snapshot.error as InvalidFormatException;
            return showError(invalidFormatException.message);
          }
          UnknownException unknownException =
              snapshot.error as UnknownException;
          return showError(unknownException.message);
        }
        return CircularProgressIndicator();
      },
    );
  }

In the above code, we catch each exception accordingly and show the correct error.


Viewing all 528 articles
Browse latest View live